
Have you ever enjoyed a video with terrible audio?
If you’re living outside the era of early TV, the chances are slim to none. Clear, crisp and appropriately used audio can make or break a video. With the release of LumaFusion 3.0 we’ve taken steps to make great improvements in LumaFusion’s audio editing tools. Along with the many new features introduced in LumaFusion 3.0, we’re excited about the new audio tools including third-party audio unit plugins and a new built-in Graphic Equalizer (EQ) with a user interface (UI) designed for touch. We’ve also redesigned and polished up the entire audio editor UI to make it easier to work on the audio in your projects.
In this post, I’ll go through each of the new tools and improvements to audio editing in LumaFusion. I’ll talk about how each tool works—including some technical details—with an ear toward how they help you create even better audio for your projects.
Graphic Equalizer
The new Graphic EQ introduced in LumaFusion 3.0 makes it easy to adjust how your audio sounds. You can use it to remove unwanted noise, boost vocals, reduce bassiness, and much more.
What is a Graphic EQ?
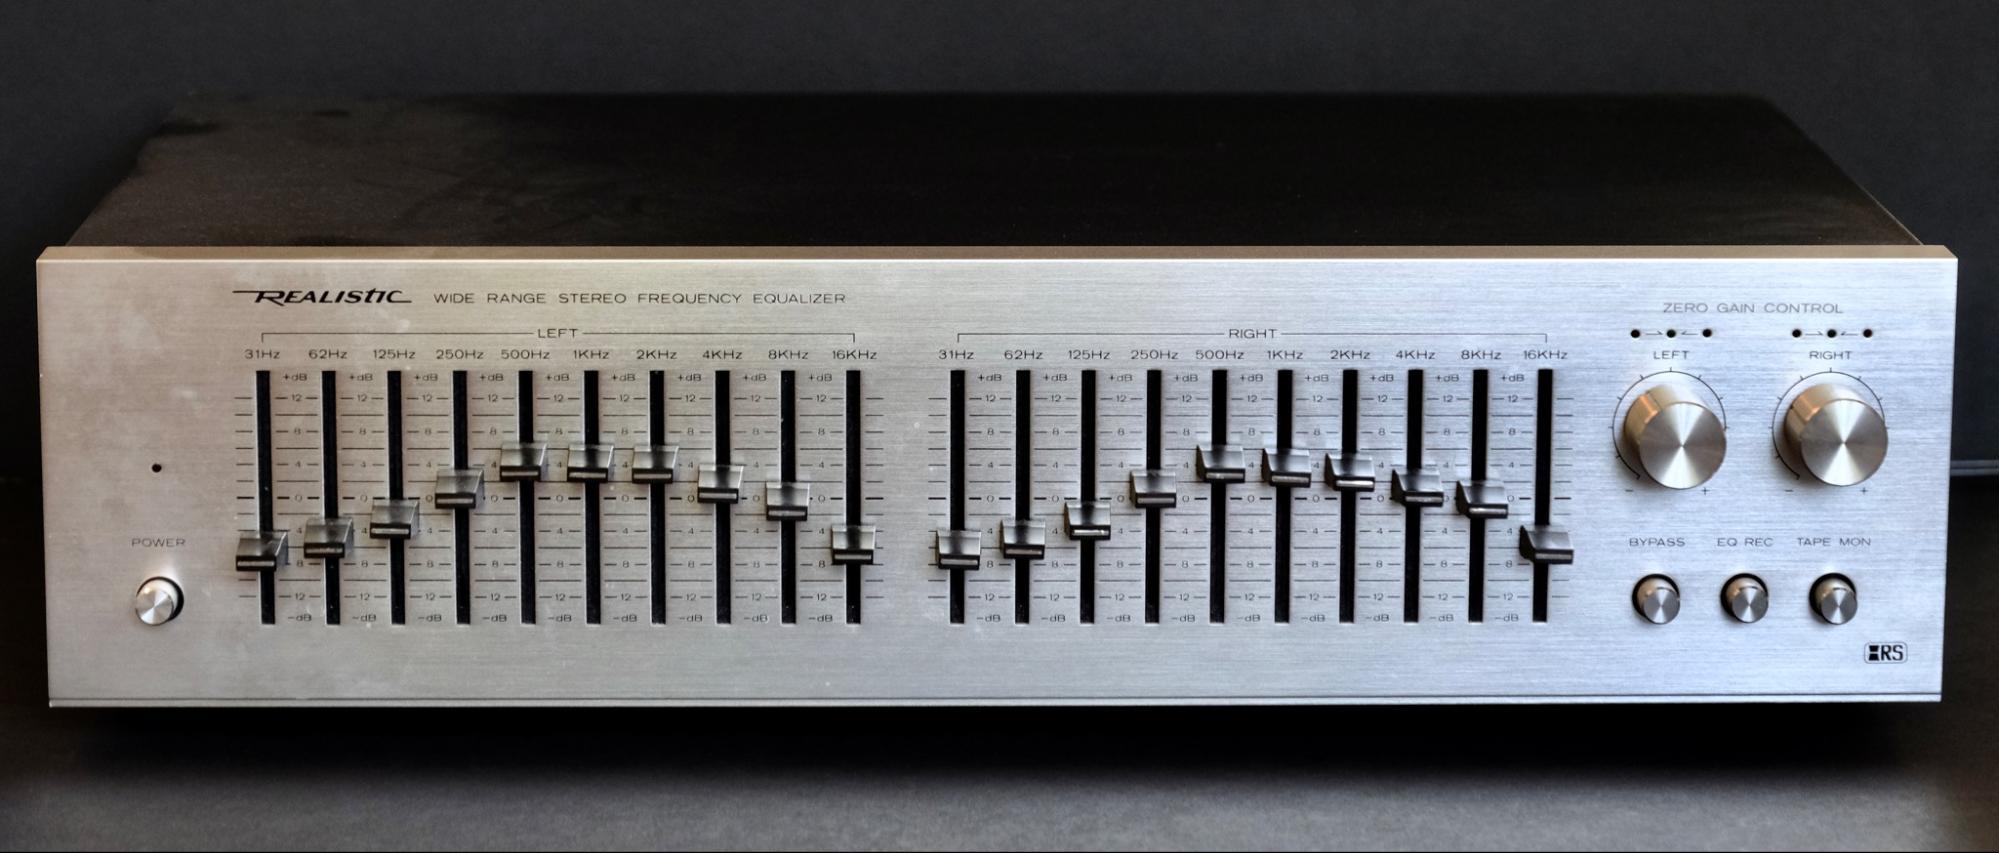
Andrew Madsen’s vintage hardware graphic equalizer.
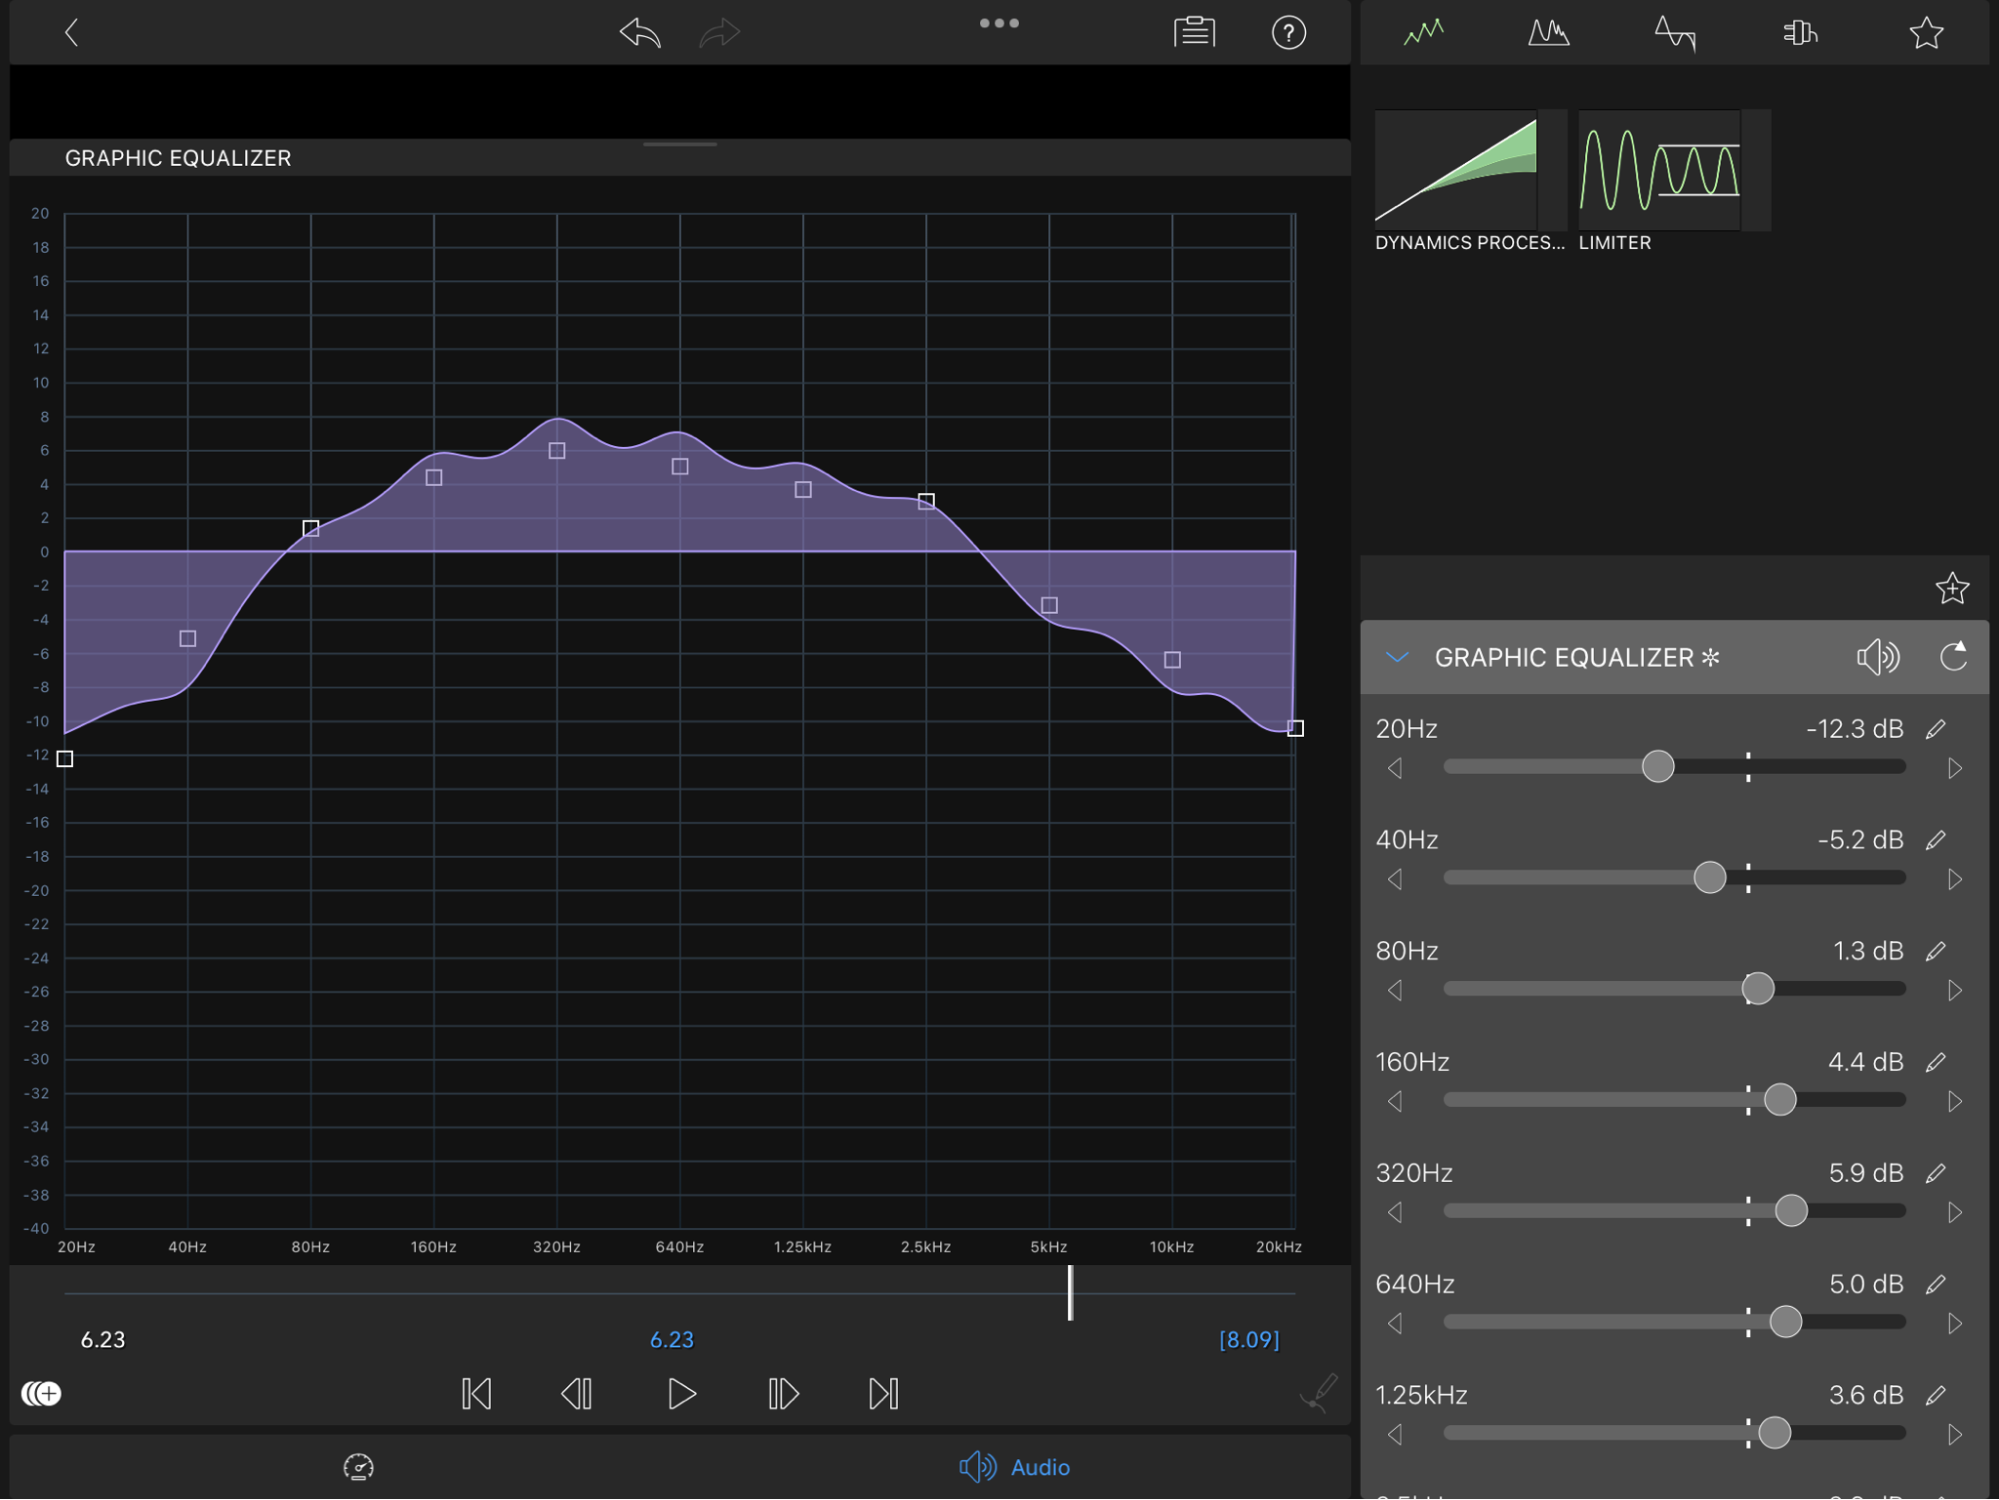
LumaFusion’s new Graphic Equalizer
A Graphic Equalizer, or Graphic EQ, is an audio filter that can boost and/or cut multiple frequencies of the sound in an audio clip. It’s called a “graphic” equalizer because the UI provides a close graphical approximation of the overall frequency response of the filter. Analog hardware graphic equalizers typically have a physical slider for each frequency band, and you can create the desired frequency response by moving the sliders into the shape of the response curve. Digital graphic equalizers, like the one in LumaFusion, work similarly, but can go further by showing you an even more accurate representation of the frequency response curve.
What can I do with it?
A Graphic EQ is a general purpose tool for adjusting the sound of your audio. However, it’s just one tool in the toolbox of audio effects included in LumaFusion. So what are some situations where a graphic EQ is the right tool for the job?
Here are a few examples:
- You have a recording of someone speaking, and there is some low frequency rumble, hum, or other unwanted environmental noise in it. You can cut lower frequency bands to reduce the noise, while boosting vocal frequencies to emphasize the parts you want to hear.
- You have a recording of live music that is bass heavy due to the acoustics of the room and microphone used to record it. You can roll off the lower bass frequencies, and boost the mid and high range frequencies to get a cleaner sound.
- You have an audio track with a muddy sound. You can make it sound clearer and more alive by boosting high mid and high frequencies a little bit.
Graphic EQs tend to produce the best results when you make changes that are gradual across bands so that a whole range of frequencies are smoothly boosted or cut. You can experiment with the sliders in the Graphic EQ interface and listen to the effect your adjustments have on the way your audio sounds.
Editor Tip: Double tap the Play button in the Clip Editor to start playing the current track in a continuous loop. Especially for short tracks, this makes it easier to hear the adjustments you’re making to the equalizer without having to constantly restart playback.
Technical Details
For those of you interested in learning some of the technical details of LumaFusion’s Graphic EQ implementation, this section is for you!
While grasping the technical details isn’t absolutely necessary for getting great results with our Graphic EQ, if you’re more technically minded and would like to understand some of the nitty gritty details, prepare yourself for a deep dive.
LumaFusion’s Graphic EQ is implemented using eleven individual bi-quad infinite impulse response (IIR) filters. Nine of them are standard peaking EQ or parametric filters, while the lowest 20 Hz band’s filter is a low shelf filter, and the highest 20 KHz band’s filter is a high shelf filter. The bands start at 20 Hz and are spaced exactly one octave apart. The labels in the UI are rounded to be more intuitively useful, but the peaking EQ bands are indeed actually one octave apart. However, the shelf filter’s cutoff frequencies are adjusted to make their adjustment sliders behave more intuitively. The low shelf filter uses a cutoff frequency of 30 Hz, while the high shelf filter is at 13.7 kHz.
Each of the peaking EQs is designed with a fixed one-octave bandwidth, and adjustable gain. The high and low shelving filters are fixed at the highest slope possible without resonance/peaking. Their actual slope in dB/octave varies with their gain.
Third Party Audio Units
Another exciting new audio feature added in LumaFusion 3.0 is support for third-party audio unit (AUv3) effects plugins. With the ability to load and use third-party audio units, you can open LumaFusion’s audio capability to new possibilities.
What are audio units?
Audio units are third party plugins for iOS, iPadOS, and macOS that can be used to process and/or analyze audio. To download an audio unit, visit the App Store. A quick search on AUv3 will present numerous options to choose from. Once you’ve found the best plugin for your project, buy (or Get) it from the App Store.
Once installed, the audio unit will become available to any audio unit “host” on your device. With the 3.0 release, LumaFusion is now an audio unit host, so you can add audio unit(s) to your tracks.
Note: Audio Units can be broken down into three categories: audio generators, MIDI instruments, and effects. LumaFusion currently only hosts effects audio units.
Audio Units Compatible with LumaFusion
Third-party audio units are external plugins for LumaFusion. Please consult each unit’s user guide for information on how to use it and troubleshoot any issues that may arise.
There are hundreds of different audio units in the App Store, with an extremely wide range of capabilities. The best way to discover the ones best for you is to explore what’s out there and try those you think are useful in LumaFusion. We already have some favorites we’re using to improve the audio in our Projects. Here are a few audio units we like, that we think you might like too:
Brusfri
Brusfri is a great advanced noise reducer with a very clean, simple interface. We use it to remove unwanted hum, hiss, and other noise from our audio recordings.
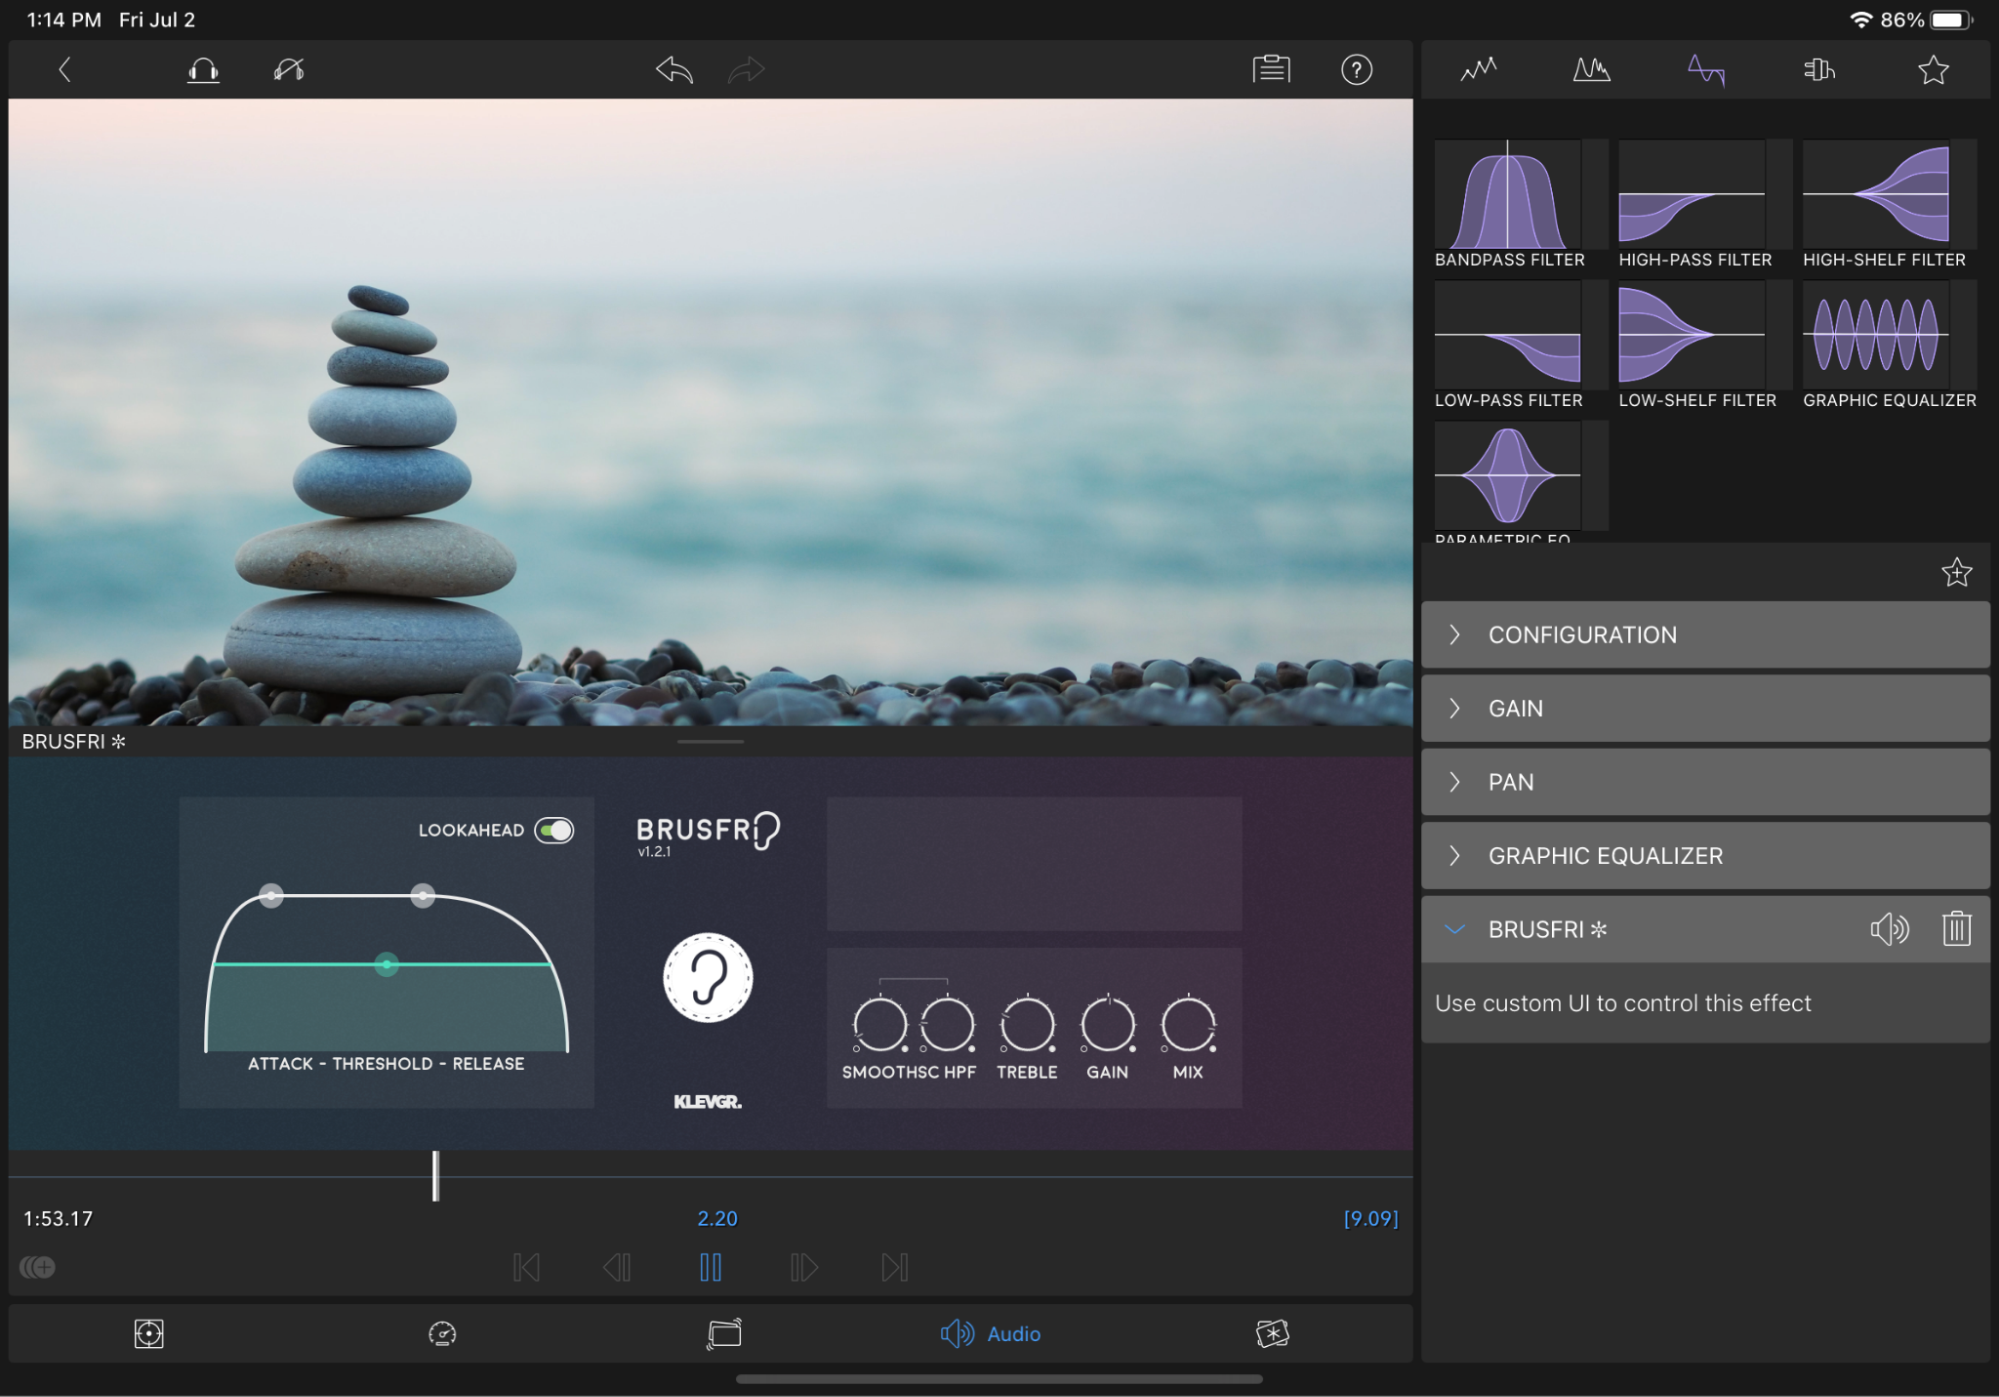
Brusfri
Zero Reverb
Zero Reverb is a must for LumaFusion editors wanting to add reverb to their audio.
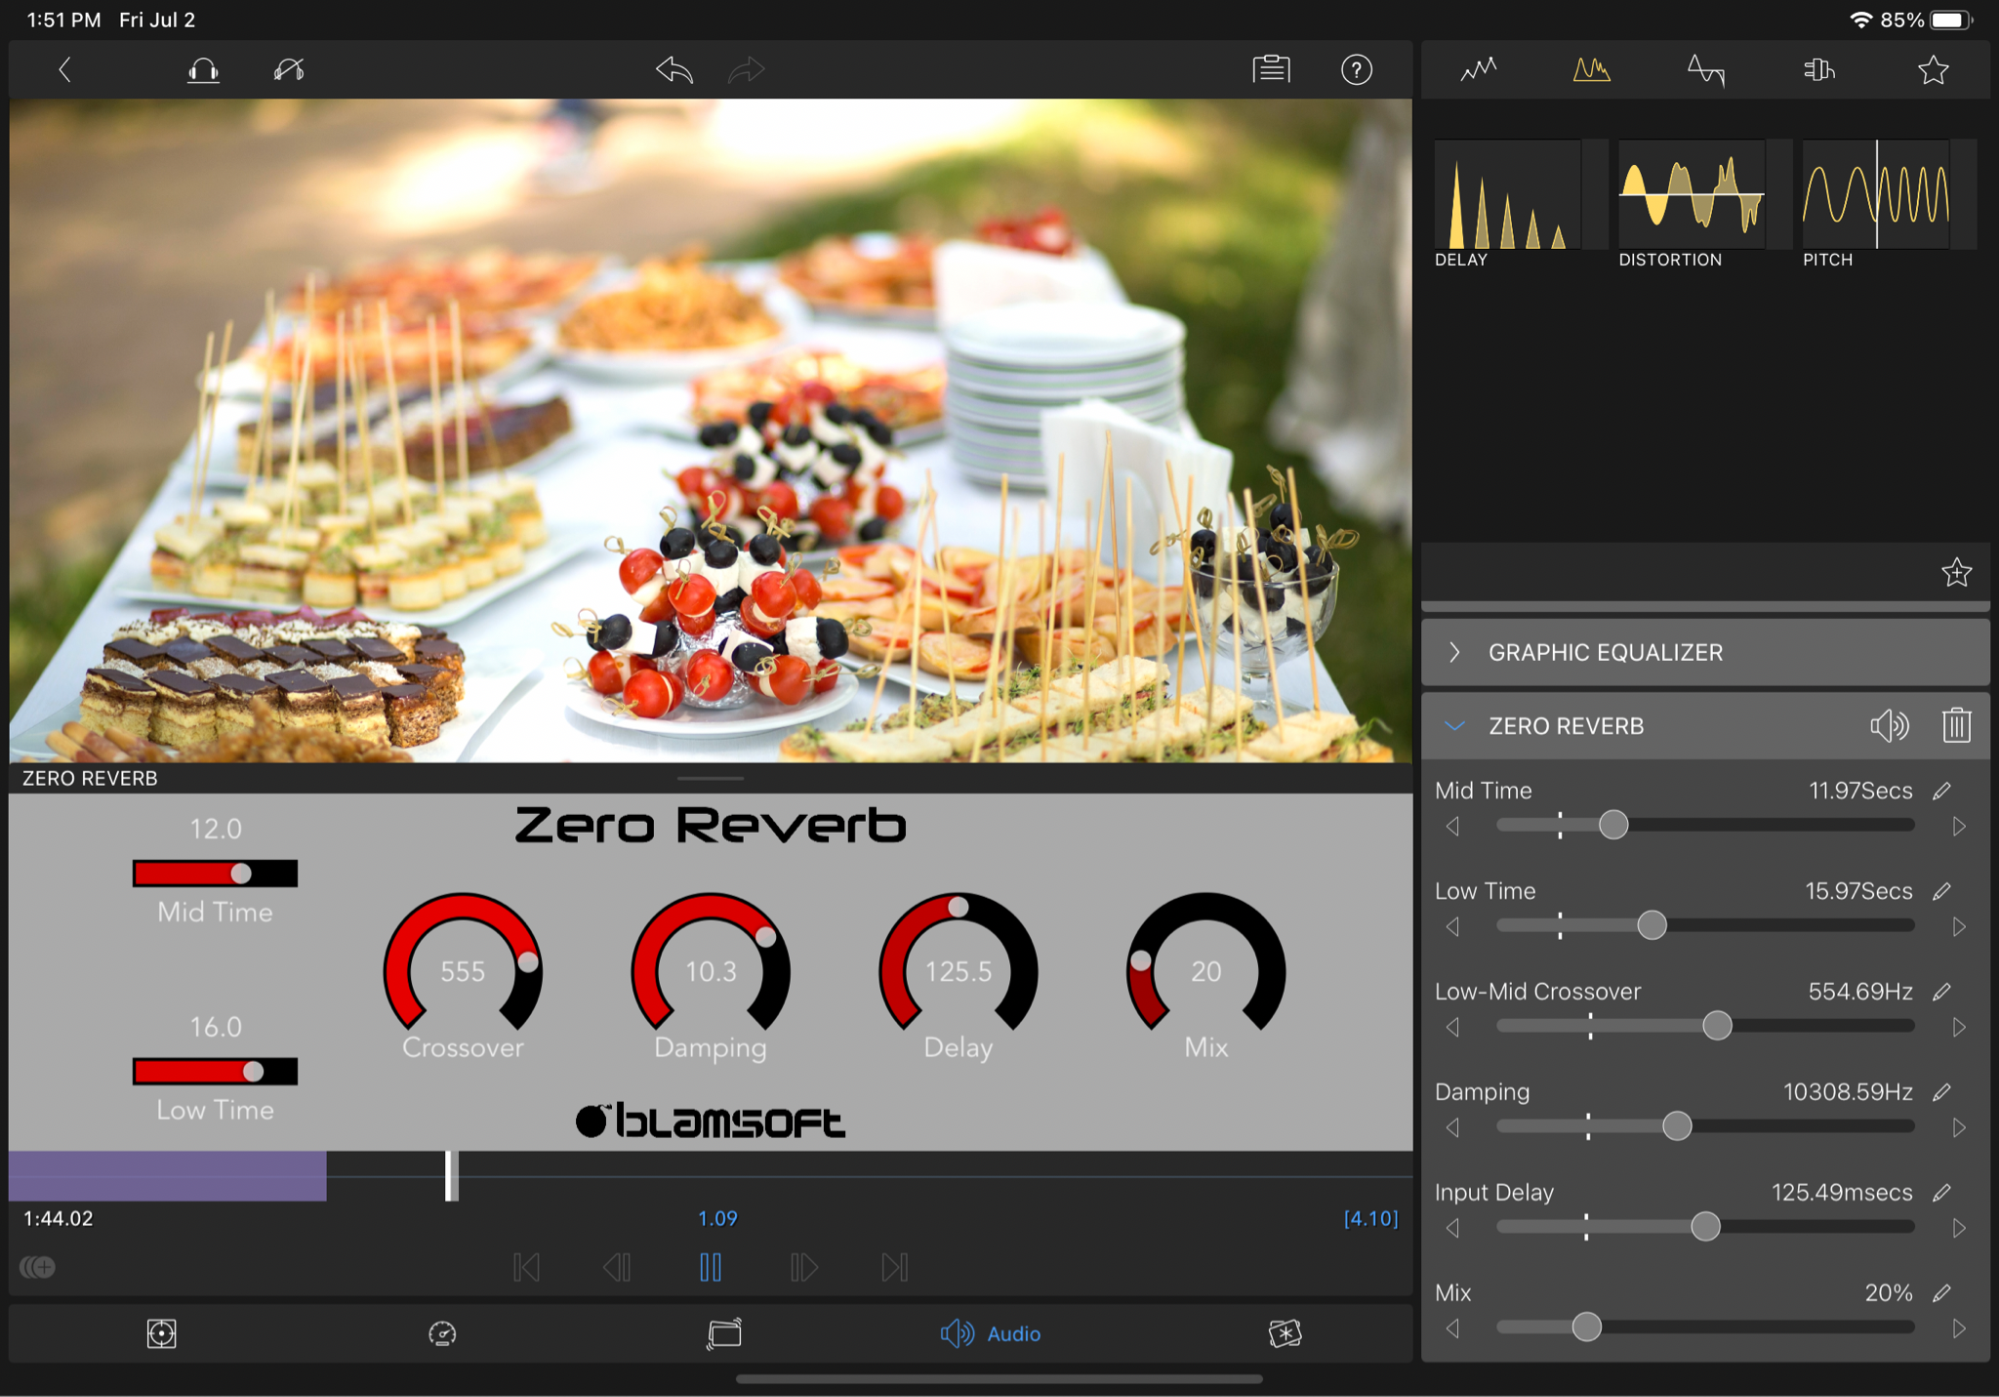
Zero Reverb
Analyser & Tuner AUv3 Plugin
Analyser & Tuner allows you to ‘see’ audio frequencies and the level of those frequencies. This way you can see which frequencies you might want to cut or boost using LumaFusion’s Graphic EQ.
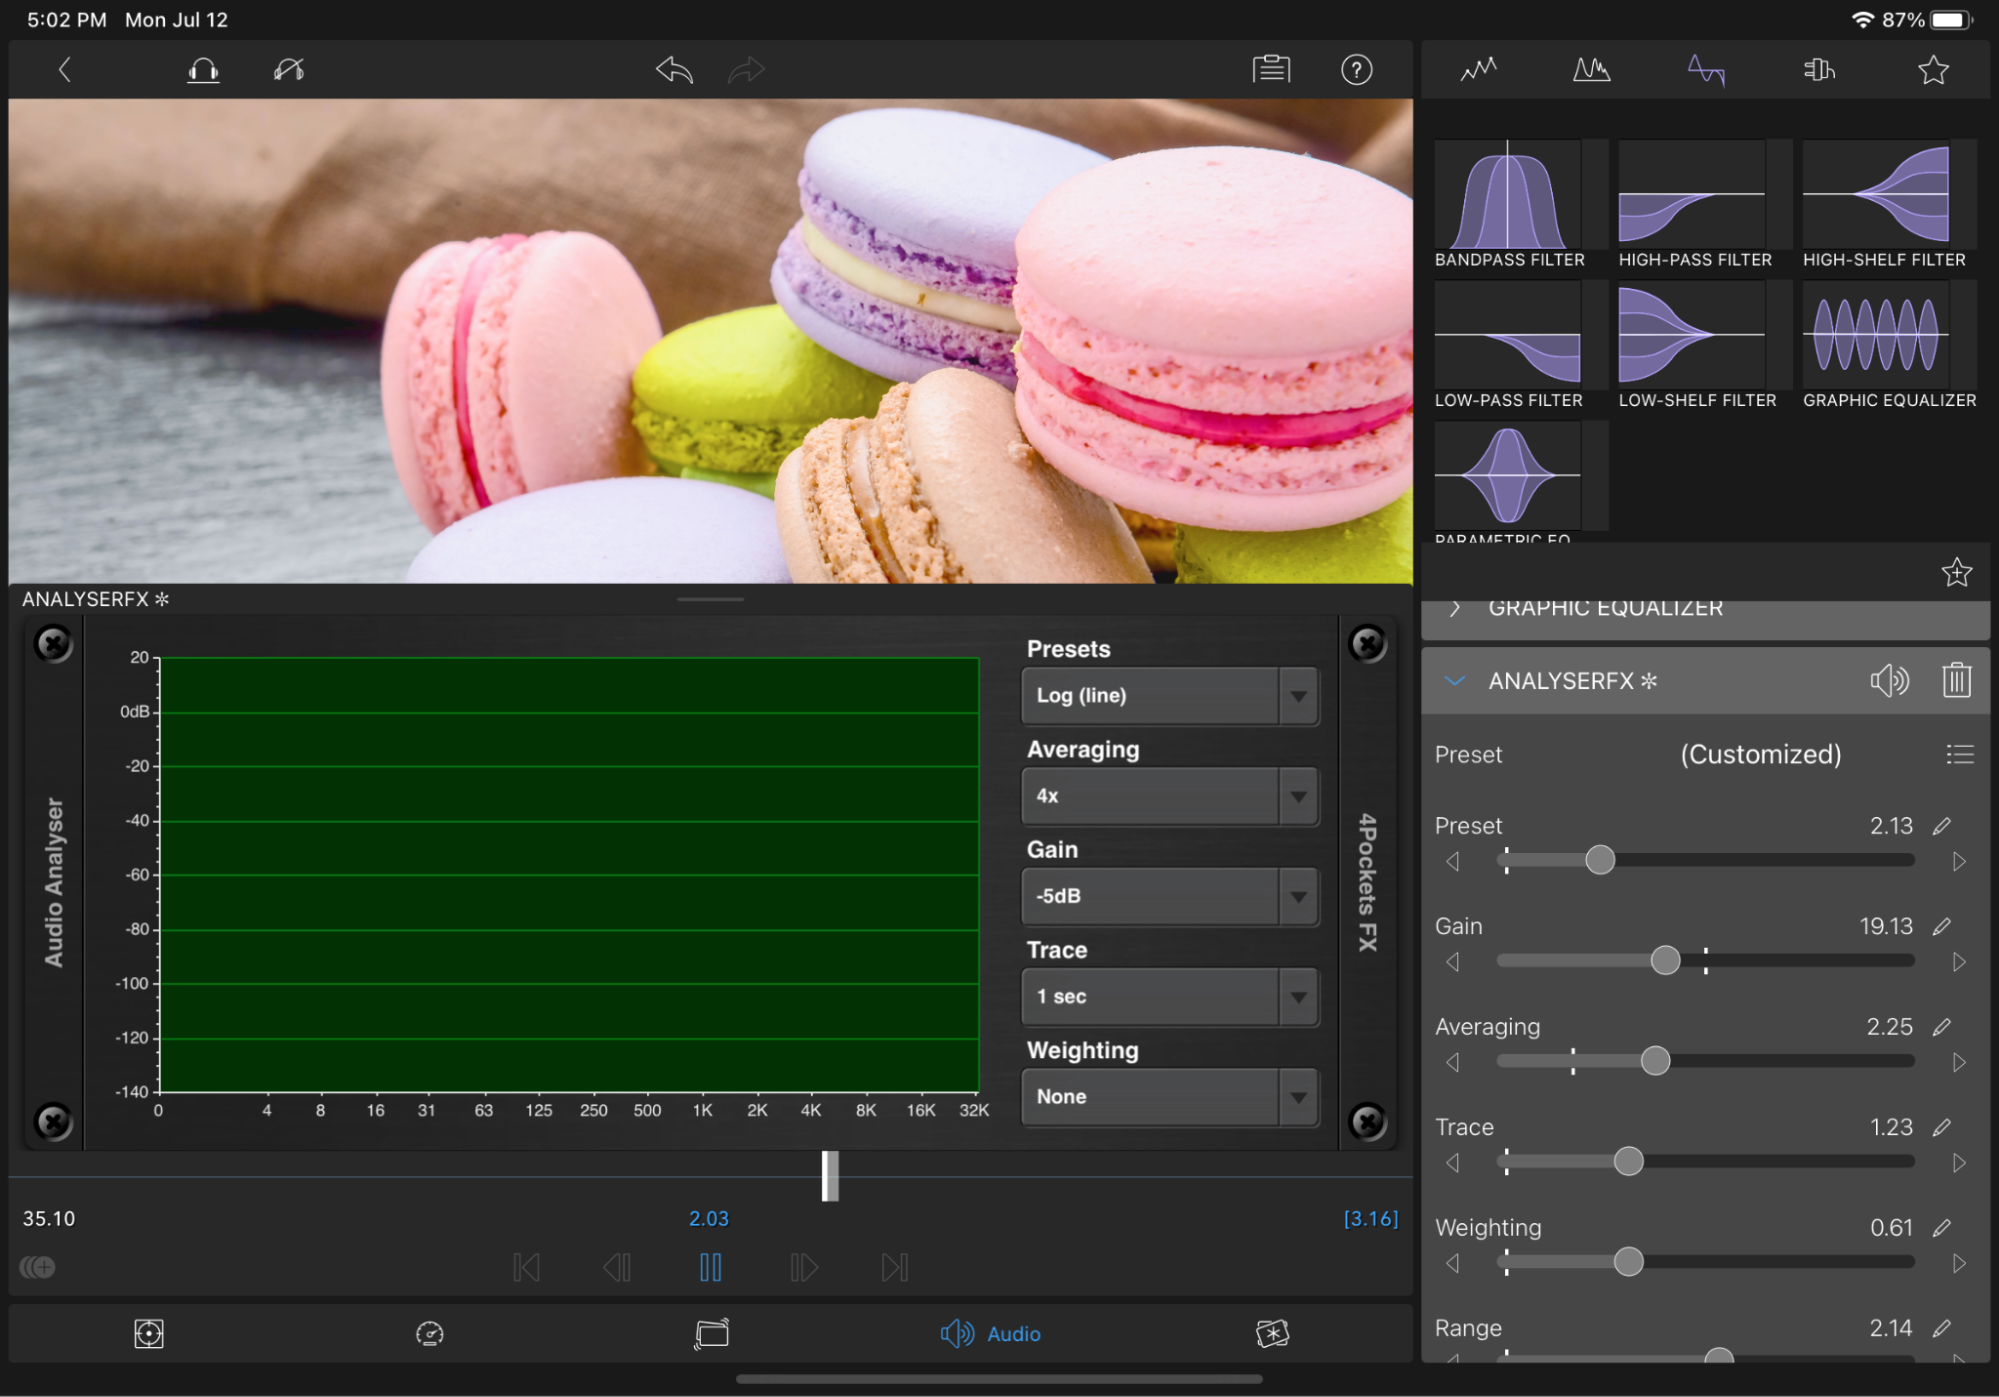
Analyser & Tuner AUv3
Tape Cassette 2
Tape Cassette 2 changes the characteristics of your sound with this effect. It’ll make your audio sound like it is coming from a worn out cassette tape with wow, flutter and other tuneable effects.

Tape Cassette 2
Redesigned UI
We’ve improved the UI for the Clip Editor, with a special focus on the audio editor in the LumaFusion 3.0 release. Beyond an overall refinement of the way everything looks, we’ve reorganized the audio effect presets so that it’s easier to find just what you’re looking for.
The built in audio effects are now split into three categories, and each is color coded as follows:
- Dynamic Effects (Green)
- Distortion Effects (Yellow)
- Filters (Purple)
We’ve also added a tab just for your third-party audio unit plugins, and of course, your own saved presets go in the last tab with the star icon.
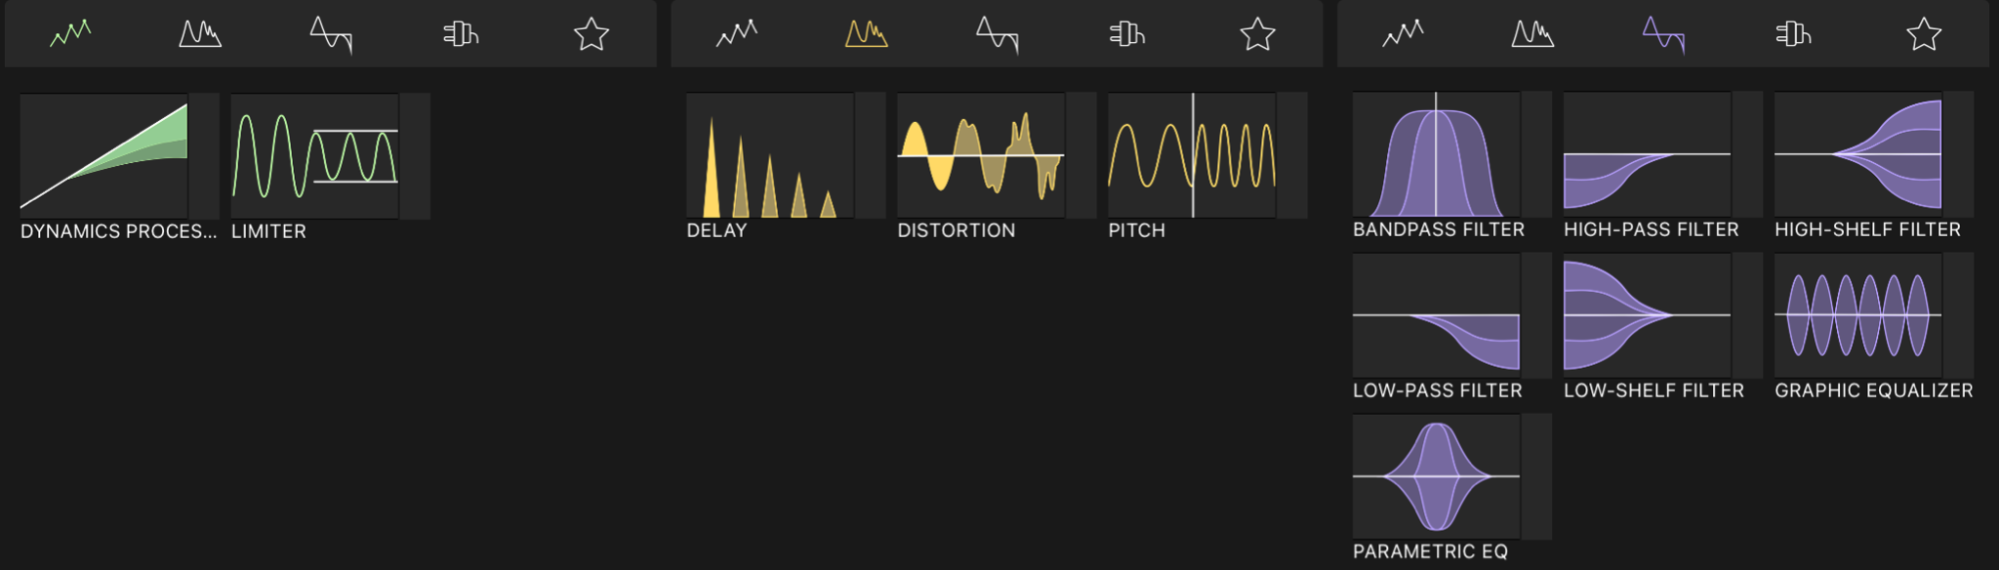
Audio Effect Categories introduced in LumaFusion 3.0
Where LumaFusion is heading with audio
We’re excited about the new audio capabilities introduced in LumaFusion 3.0. The app has always had an incredible video engine; our goal is for the audio editor to be just as good for your post-production workflow.
We hope you find these new audio improvements useful and we’d love to hear about how they change your editing workflow. Share your feedback with us on Twitter, Facebook, or email us at support@luma-touch.com.