After months of extensive development, design, and feedback from beta testers, the much anticipated LumaFusion version 3.0 is now available to download from the App Store. This feature-filled free update for existing customers enables new workflows and solutions to explore as editors craft their next edit on an iPhone, iPad, or M1 Mac.
LumaFusion 3.0 TL;DR
- LumaFusion 3.0 introduces a number of new features including:
- Lock & Load Stabilizer by CoreMelt
- Direct External Drive Editing
- 3rd Party Audio Unit Support
- Graphic Equalizer (Graphic EQ)
- Resizable UI
- And a bunch of other improvements
To get a basic understanding of each feature before trying them out for yourself, read on.
Video Stabilization
If you ask a group of video makers how to fix shaky footage, don’t be surprised if someone cleverly suggests ‘use a tripod.’ Point made, but that doesn’t help when you’ve already started editing. Thankfully for editors, LumaFusion now offers a practical answer, the Lock & Load Stabilizer.
Use FiLMiC Pro, or any other camera app, to shoot from the hip without a tripod or gimbal and bring the footage right into LumaFusion. You’re now only a quick tap away from stabilizing shaky video into steady static shots or fluid tracking shots.
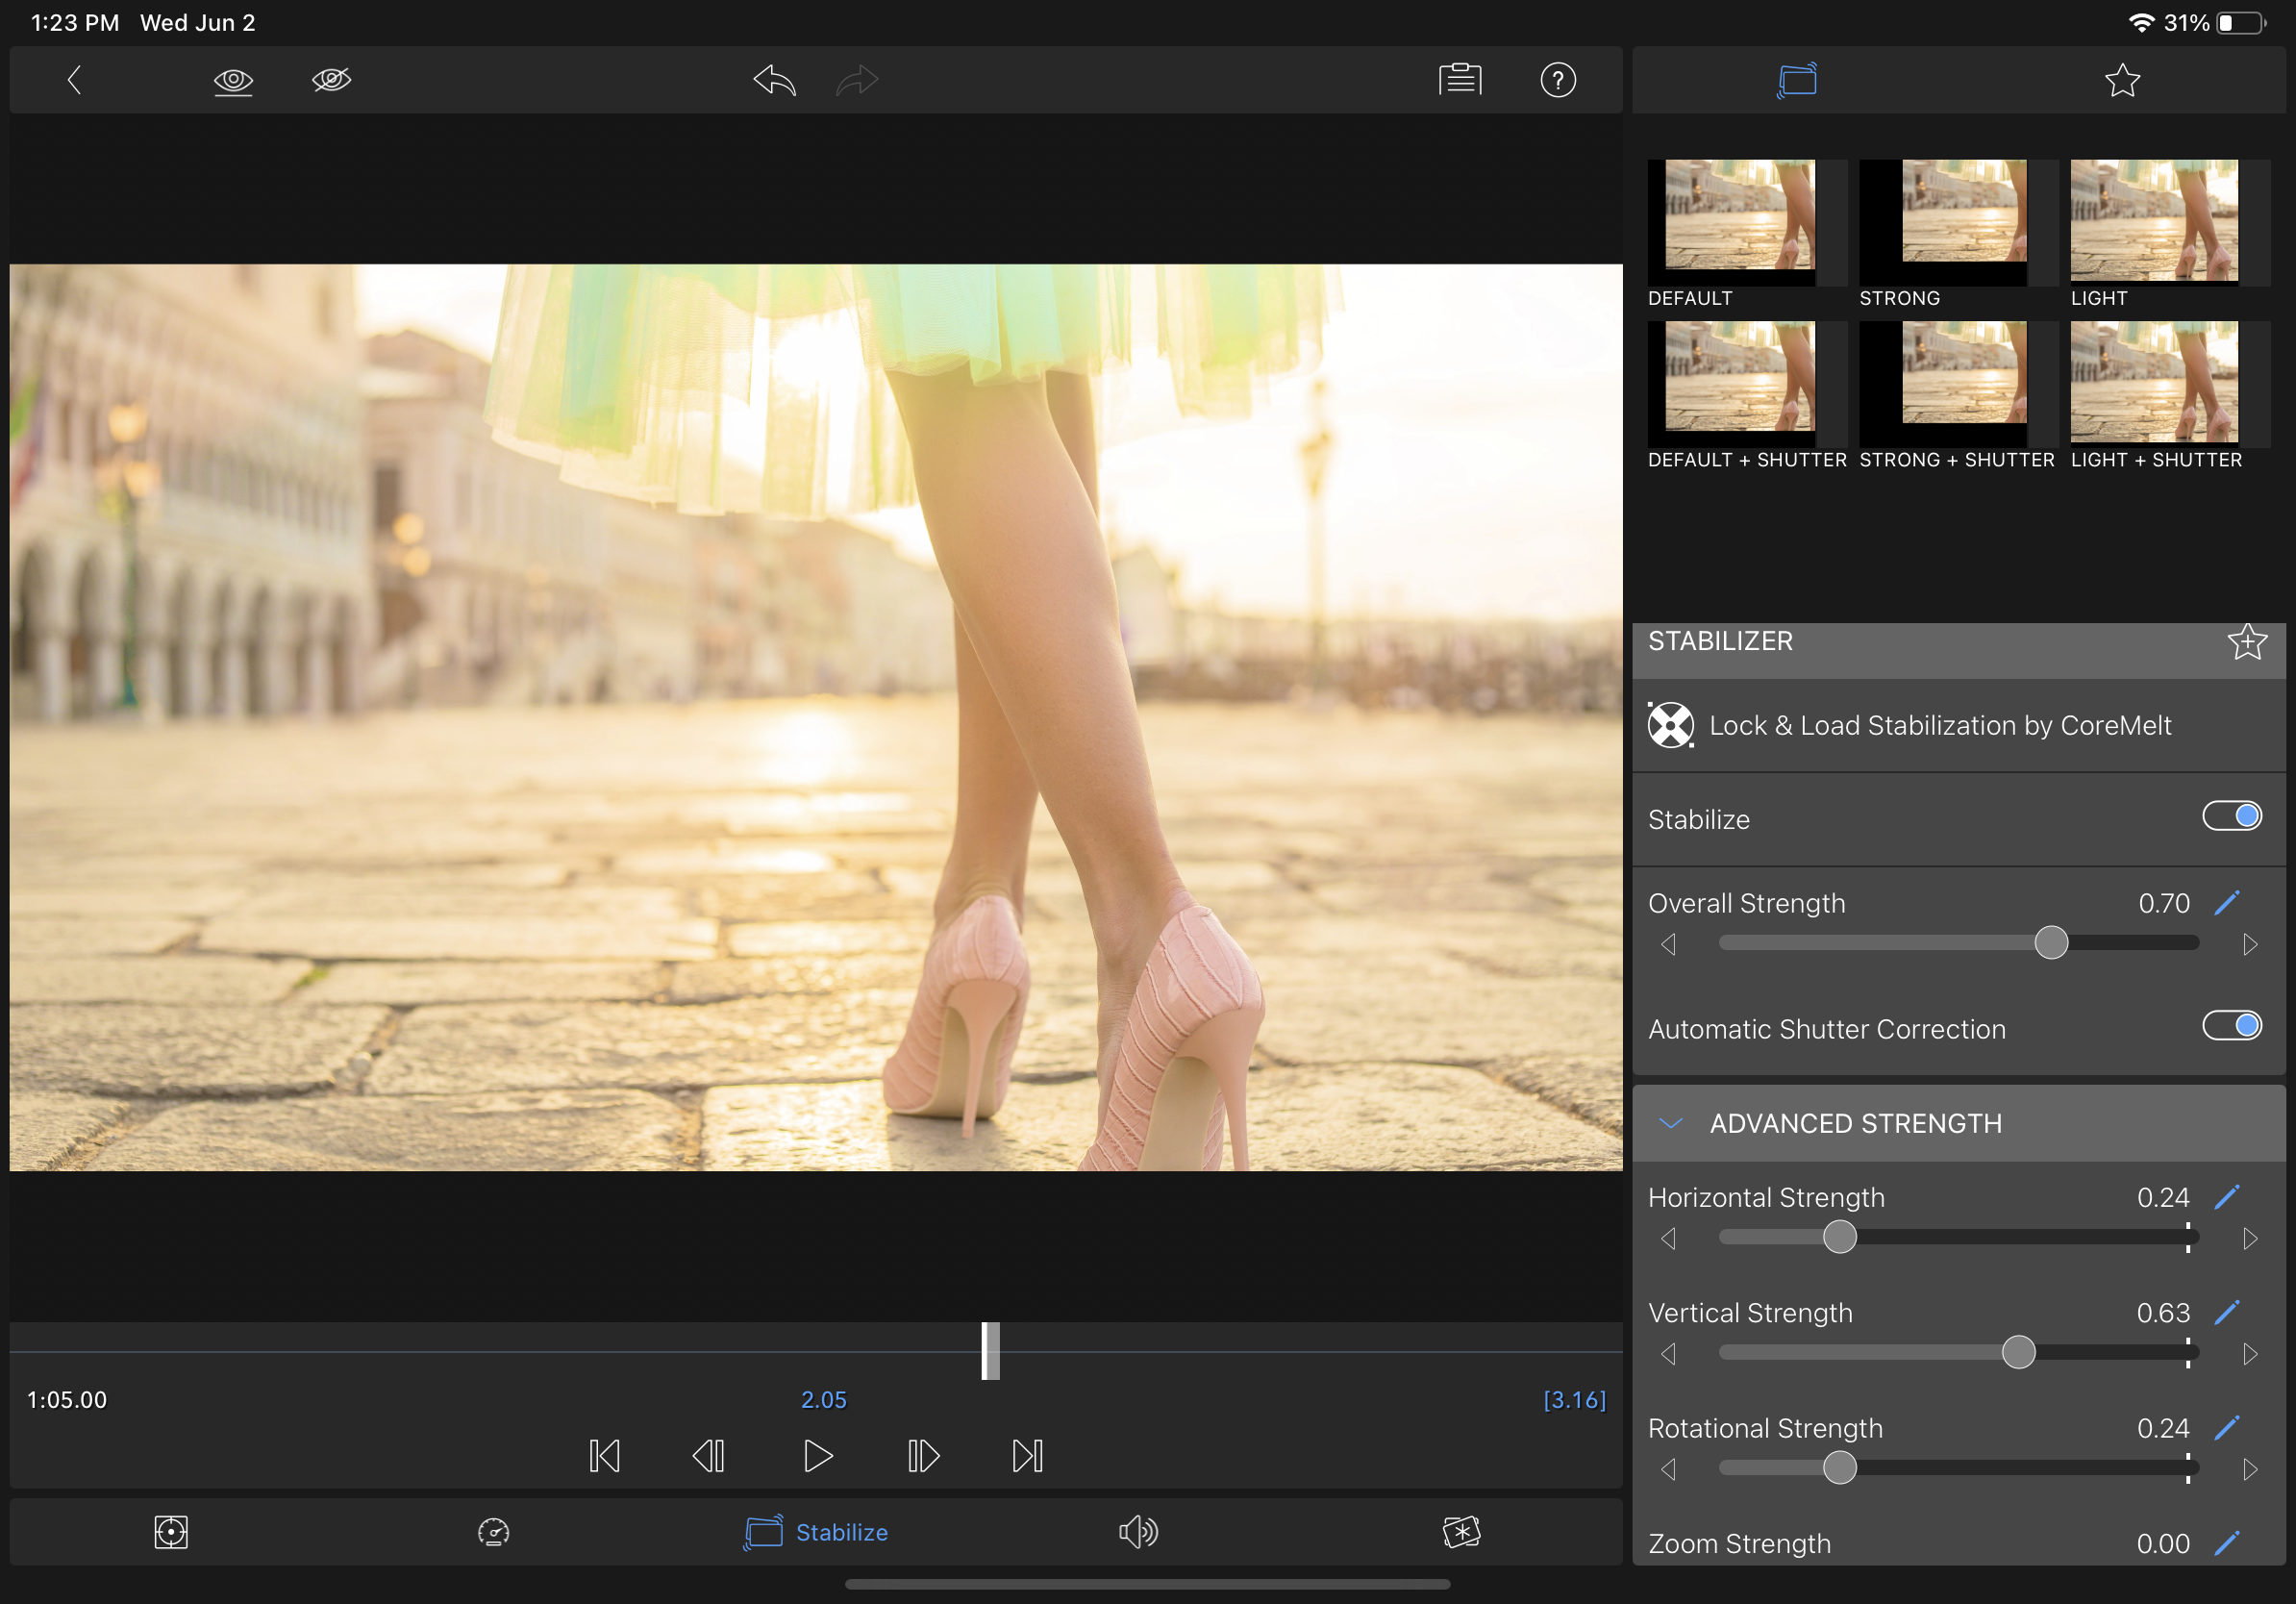
You’ll find the Lock & Load Stabilizer in a new tab in the Effects Panel. To access it, double tap your clip. Once open, you can adjust the strength of the effect with sliders for the vertical, horizontal, and rotational parameters in real time to ensure you don’t overdo it and that your clip matches your creative vision.
You’ll find the Lock & Load Stabilizer in a new tab in the Effects Panel. To access it, double tap your clip. Once open, you can adjust the strength of the effect with sliders for the vertical, horizontal, and rotational parameters in real time to ensure you don’t overdo it and that your clip matches your creative vision.
Editor Tip: The less stabilization you apply to a clip, the more original video quality will remain. When in doubt, let the automatic detection do its thing; CoreMelt’s technology does an excellent job determining how much to add on its own to improve the clip and make it look as natural as possible.
For those new to using stabilization software, it generally works better for certain clips than others. For instance, trembling static shots stabilize well, as do shaky tracking shots, such as following behind a traveling person with only gradual turns, if any. Shots that don’t work well are when the entire composition changes drastically. Quick pans, for example spinning 180 degrees from a character to what they’re looking at or tilts, like quickly changing the focal point from the bottom to the top of a building.
However, it’s important to heed the advice of sage editors: Stabilization isn’t a miracle solution and can’t fix every shaky clip. For example motion blur can’t be removed using stabilization. This is one reason why fast pans and tilts are a no-go. In general, stabilizing footage with a higher frame rate gives you a better chance of avoiding any motion blur problems.
It’s not perfect but it’s the next best thing to having a time travel spell to take you back to setting up a tripod or holding the camera slightly more steady in your hand. You’ll be amazed by how many shots you can salvage with the Lock & Load Stabilizer.
Direct External Drive Editing/Export
Mobile editing is an exciting departure from traditional editing but it does have its own share of hurdles to overcome. With LumaFusion 3.0, you’re about to clear one of the tallest hurdles on the field: media storage.
With each passing year storage space gets cheaper and more compact. The new iPad Pro for example is available with a whopping 2 TB; it wasn’t that long ago an external drive weighed more and stored far less. The problem for video editors is files keep getting bigger as well, thanks to improved capture quality on cameras. Twenty or 64 or even 2000 Gigs of space just won’t carry you as far as it used to.
With LumaFusion 3.0, as long as you have an iOS device with USB-C and a fast external drive, you can edit directly from and export directly to your external drive. No need to store any media on your iPad with this workflow. The project file can remain on your iPad, since those files are minuscule compared with 4k or even HD media.
Editing from an external drive in LumaFusion is a straightforward process. To get started, go to Settings and toggle External Drive Editing on. You can set up the Library to detect your entire drive, or just particular folders. Linking your media is a few taps away, so you don’t have to worry about taking a break in the middle of your edit and disconnecting your drive.
Whether you’re working on a feature length film or content for your YouTube channel, LumaFusion is ready for your media!
Resizable UI
This may seem like one of the smaller features introduced in LumaFusion 3.0 but we’ve got a feeling it just might be the most used. Sometimes you need a larger Preview panel because you’re working on something small in the back corner. Maybe you just need a thumbnail sized reference video and the timeline is your primary focus. With the introduction of Resizable UI we’re happy to give editors the ability to resize the UI to their specific editing needs.
To activate the Resizable UI, hold your finger down on the Resize Handle, located where all the windows meet. Once you’ve got hold, drag your finger in any direction to adjust the UI to create your prefered layout. If you switch to another layout, any adjustments you’ve made to the previous will be saved for when you return. To return to a default layout, double tap the Resize handle or restart the app.
Numerical Input
Sliders are great for quickly making large adjustments to videos, effects or graphics in LumaFusion. But when you’re an editor with stubby, Orc-like fingers (several of us at LumaTouch included) precise edits with the sliders can sometimes be frustrating. An Apple Pencil can help with precision but not every LumaFusion editor has one at their disposal and they’re no help for iPhone editors.That’s why we’ve introduced in LumaFusion 3.0, Numerical Input.
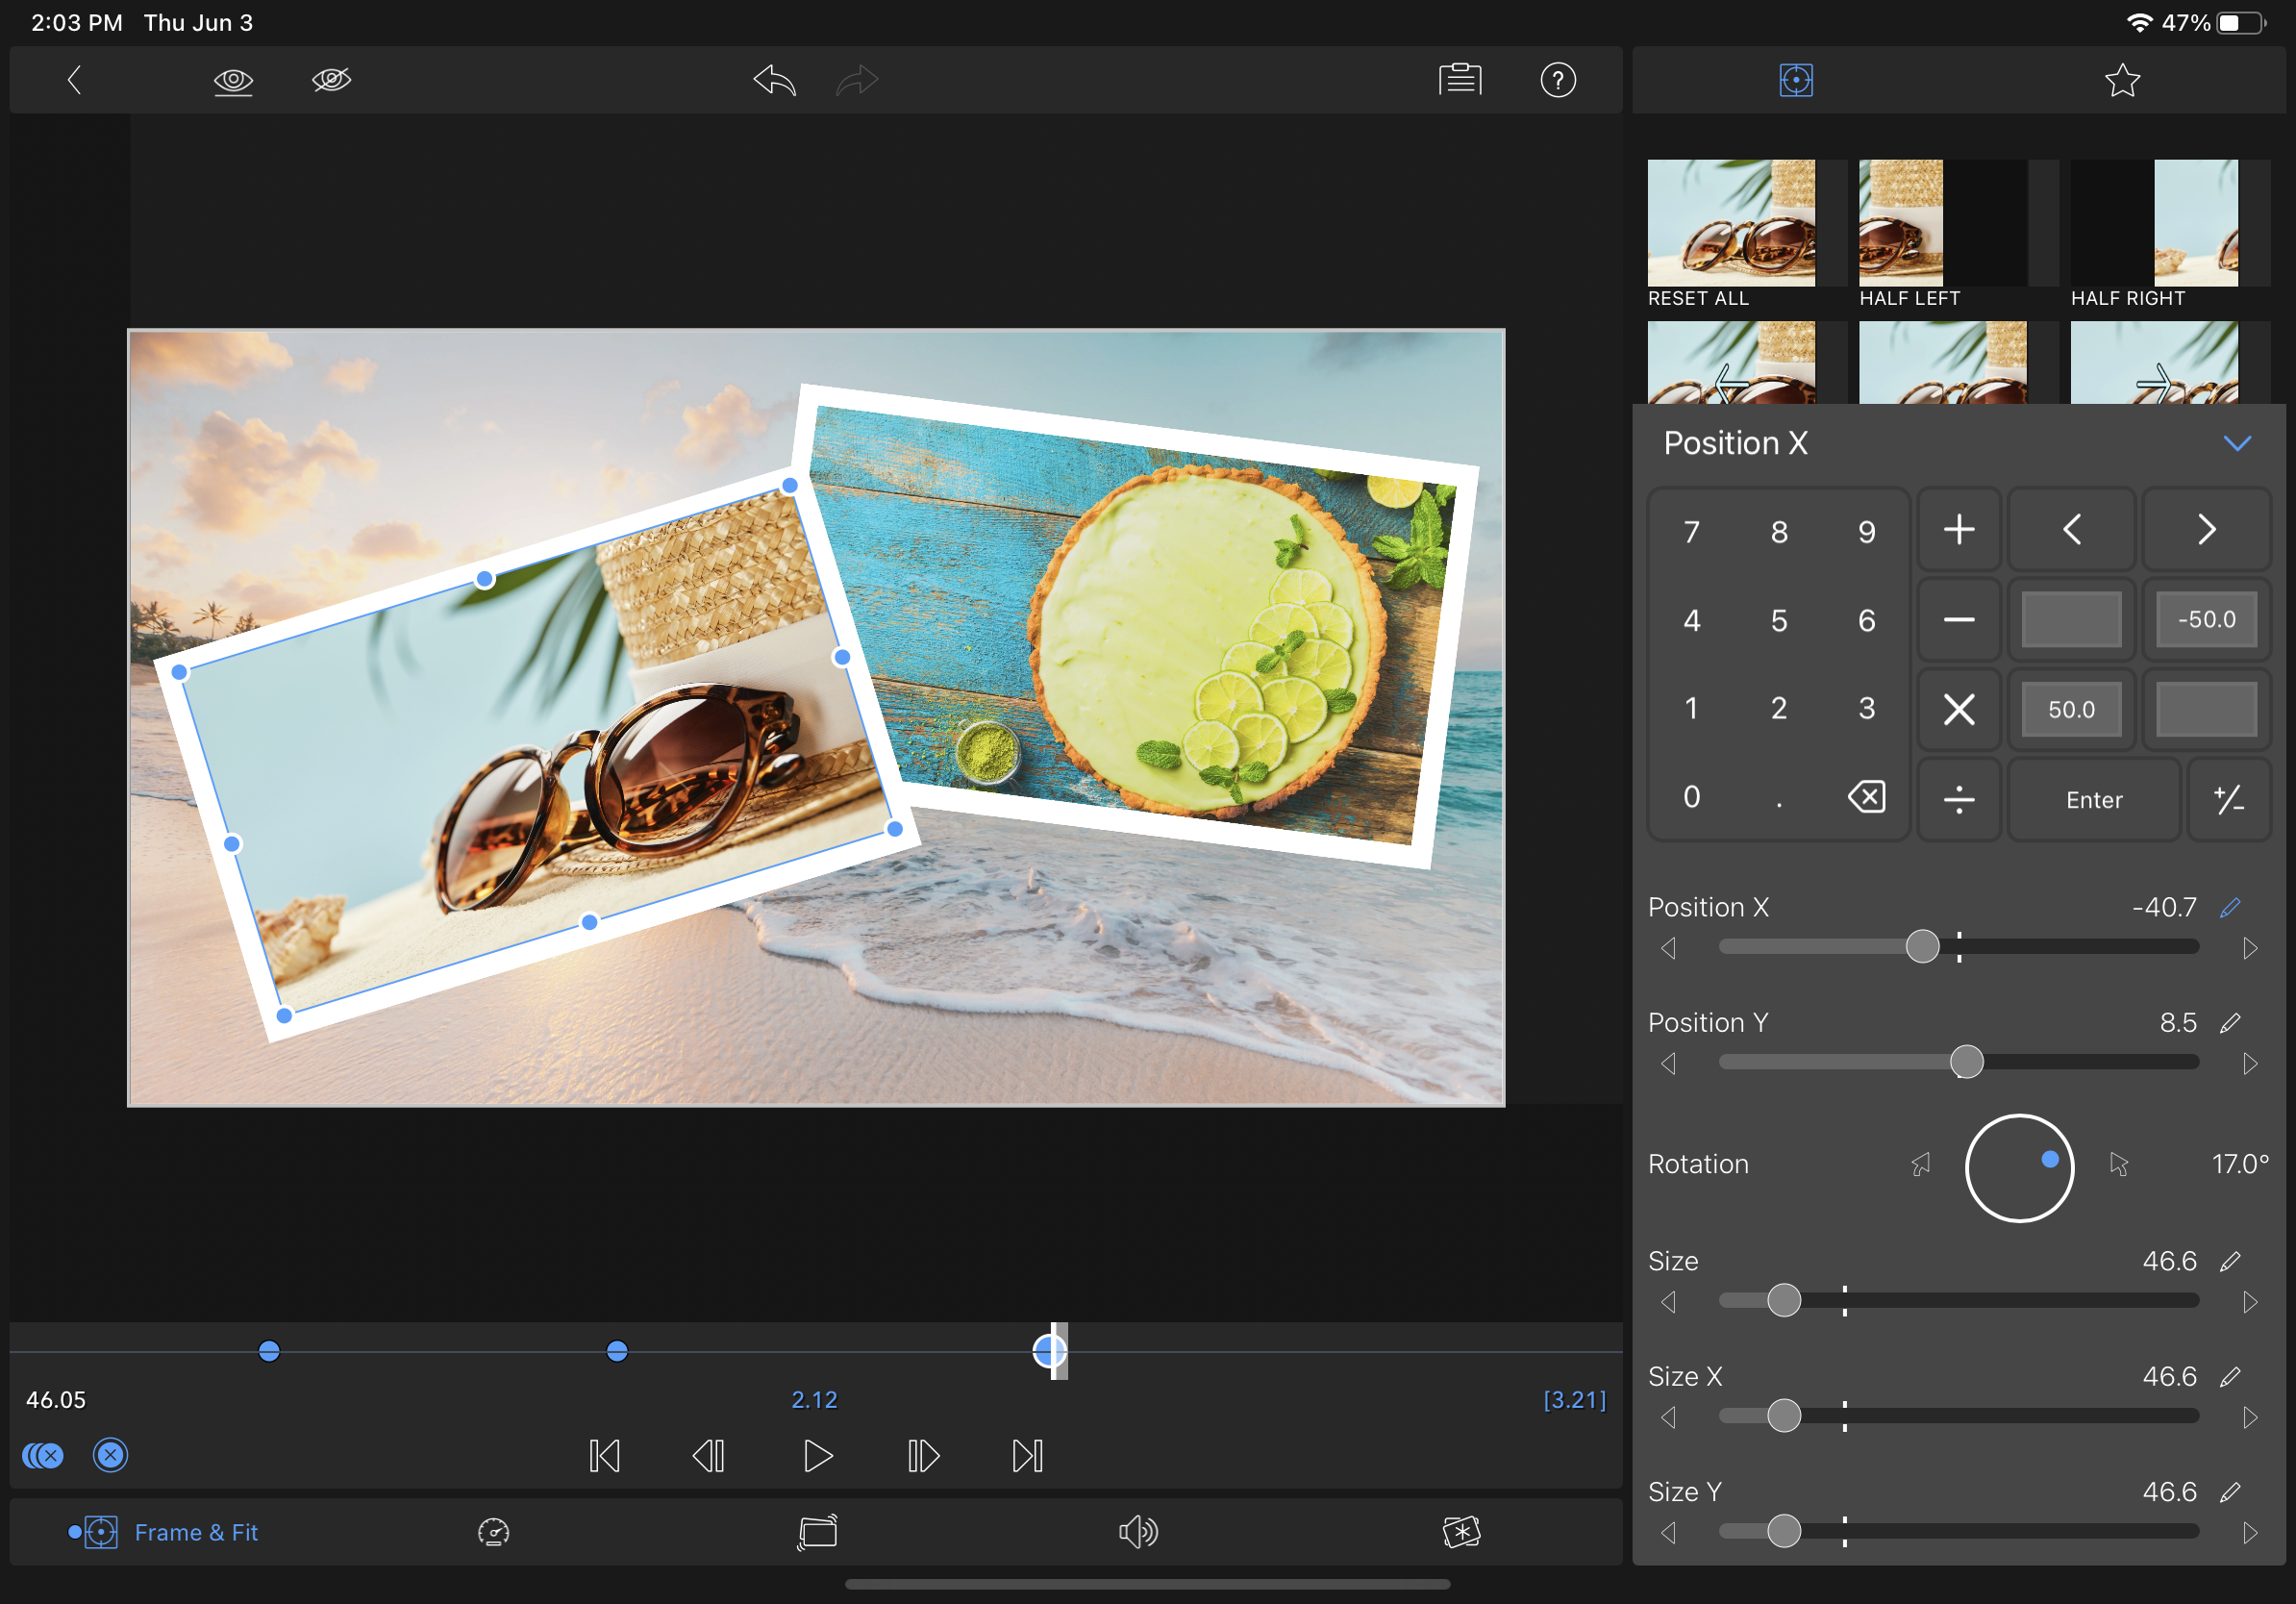
To the right of each slider bar or rotator dial is a new icon that looks like a pencil. Tapping this icon brings up the Numeric Input panel, which allows editors the ability to type in a precise value down to the decimal point. This keypad is available for any adjustments that require the slider or rotator in LumaFusion.
This new function allows for easily editing effects that require repetition and precision, such as dividing the screen into quadrants. For example, tiling several shots together that play in unison on the screen. You no longer need to worry about nudging and tapping each shot into position, just type in the correct location and size then you’re good to go. Editing those Zoom-choir videos just got streamlined.
Audio

Led by Andrew Madsen, an experienced audio engineer, LumaFusion’s audio editing tools received a massive update in LumaFusion 3.0.
An entire specialty in its own right, we’ve dedicated an in-depth blog post about the topic written by Andrew. For this post, we’ll cover the basics of the Graphic EQ and 3rd Party Audio Units (AUv3).
For starters, the new Graphic EQ introduced in LumaFusion 3.0 gives editors substantially more control when manipulating audio frequencies. If you’re not familiar with audio editing, this feature may look intimidating, but you won’t regret learning the basics.
Once you understand which sounds fall on which frequencies, you’ll gain a whole new level of control over your edit. You’ll be able to soften an irritating background noise or level out a particularly bassy voice. These are just a few examples. To wade into audio more with us, Tweet or DM us with questions. Psst… we employ audio and video nerds here at LumaTouch. Hit us with your best questions.
When it comes to audio effects, the ability to add 3rd Party Audio Units opens the door to a plethora of possibilities. Starting in LumaFusion 3.0 you can now download audio unit plugins from other developers in the App Store to enhance your audio toolkit inside LumaFusion.
Need to add some great reverb? There’s an app for that.
How about quickly eliminating room noise or isolating vocals? There are apps for those too.
Noticing a pattern? If it’s an effect you want, you can probably find it in a 3rd party audio unit. (Note that AUv3 instruments and AU MIDI plugins are not supported in LumaFusion.)
For a deeper dive into the audio improvements introduced in LumaFusion 3.0, check out this in-depth post by Andrew.
Additional Improvements
Yes, there’s more. We’ve made a number of small improvements across the app with the LumaFusion 3.0 update.
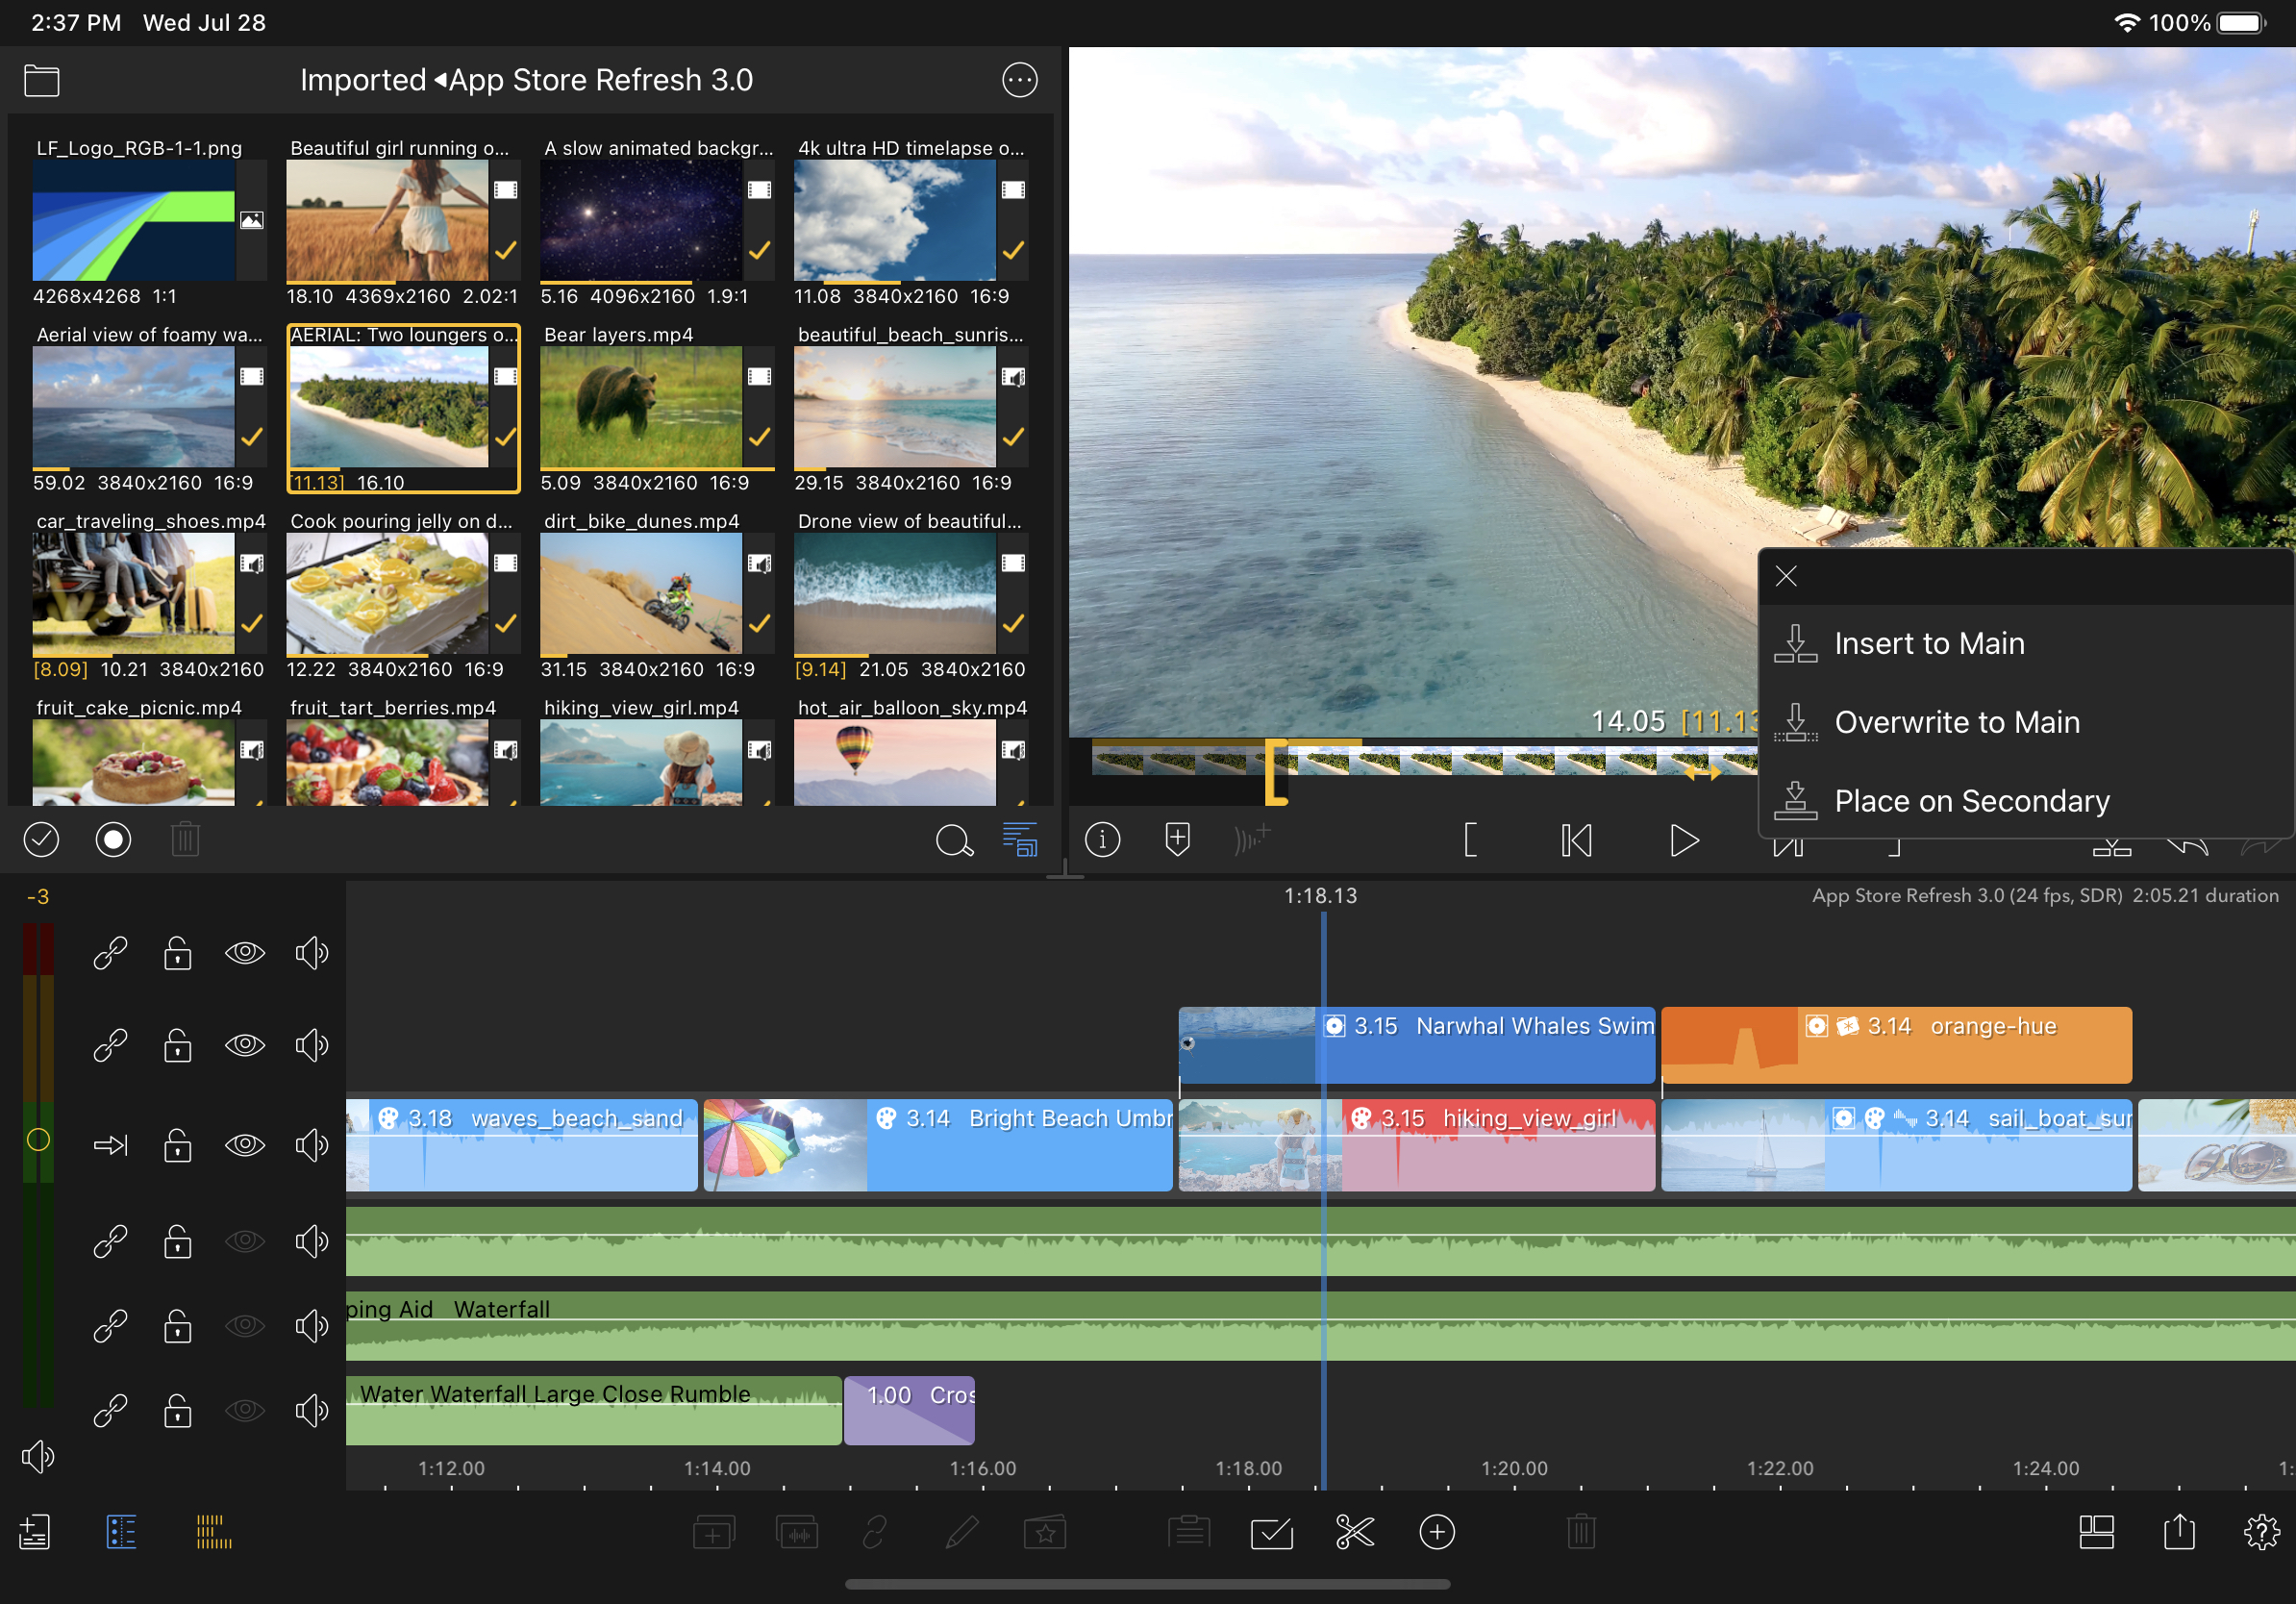
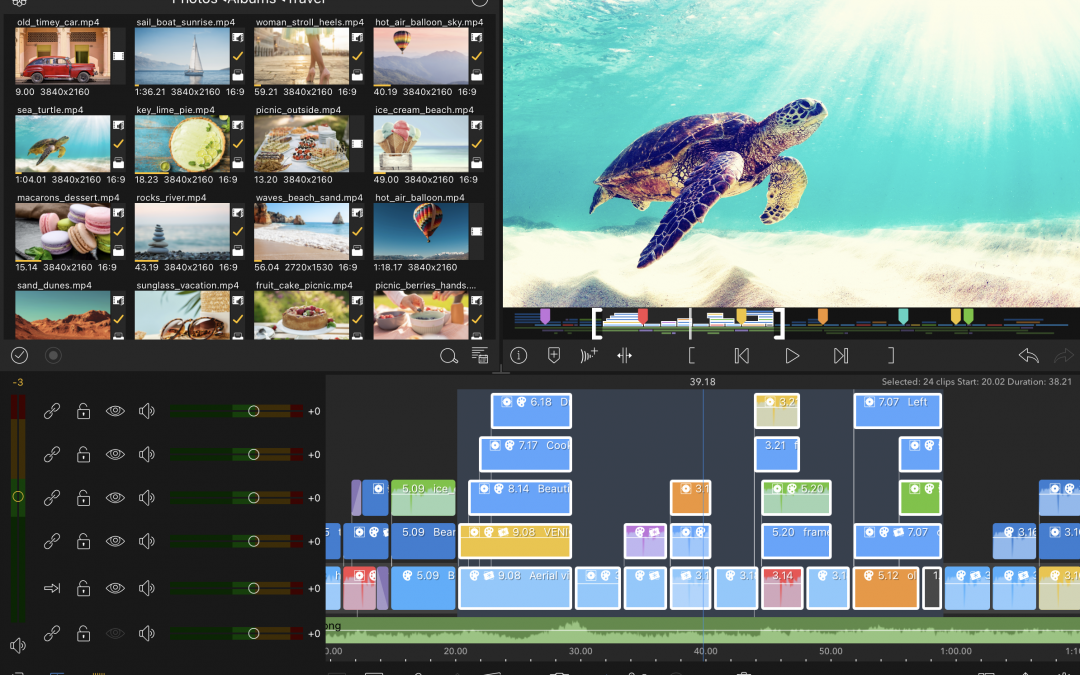
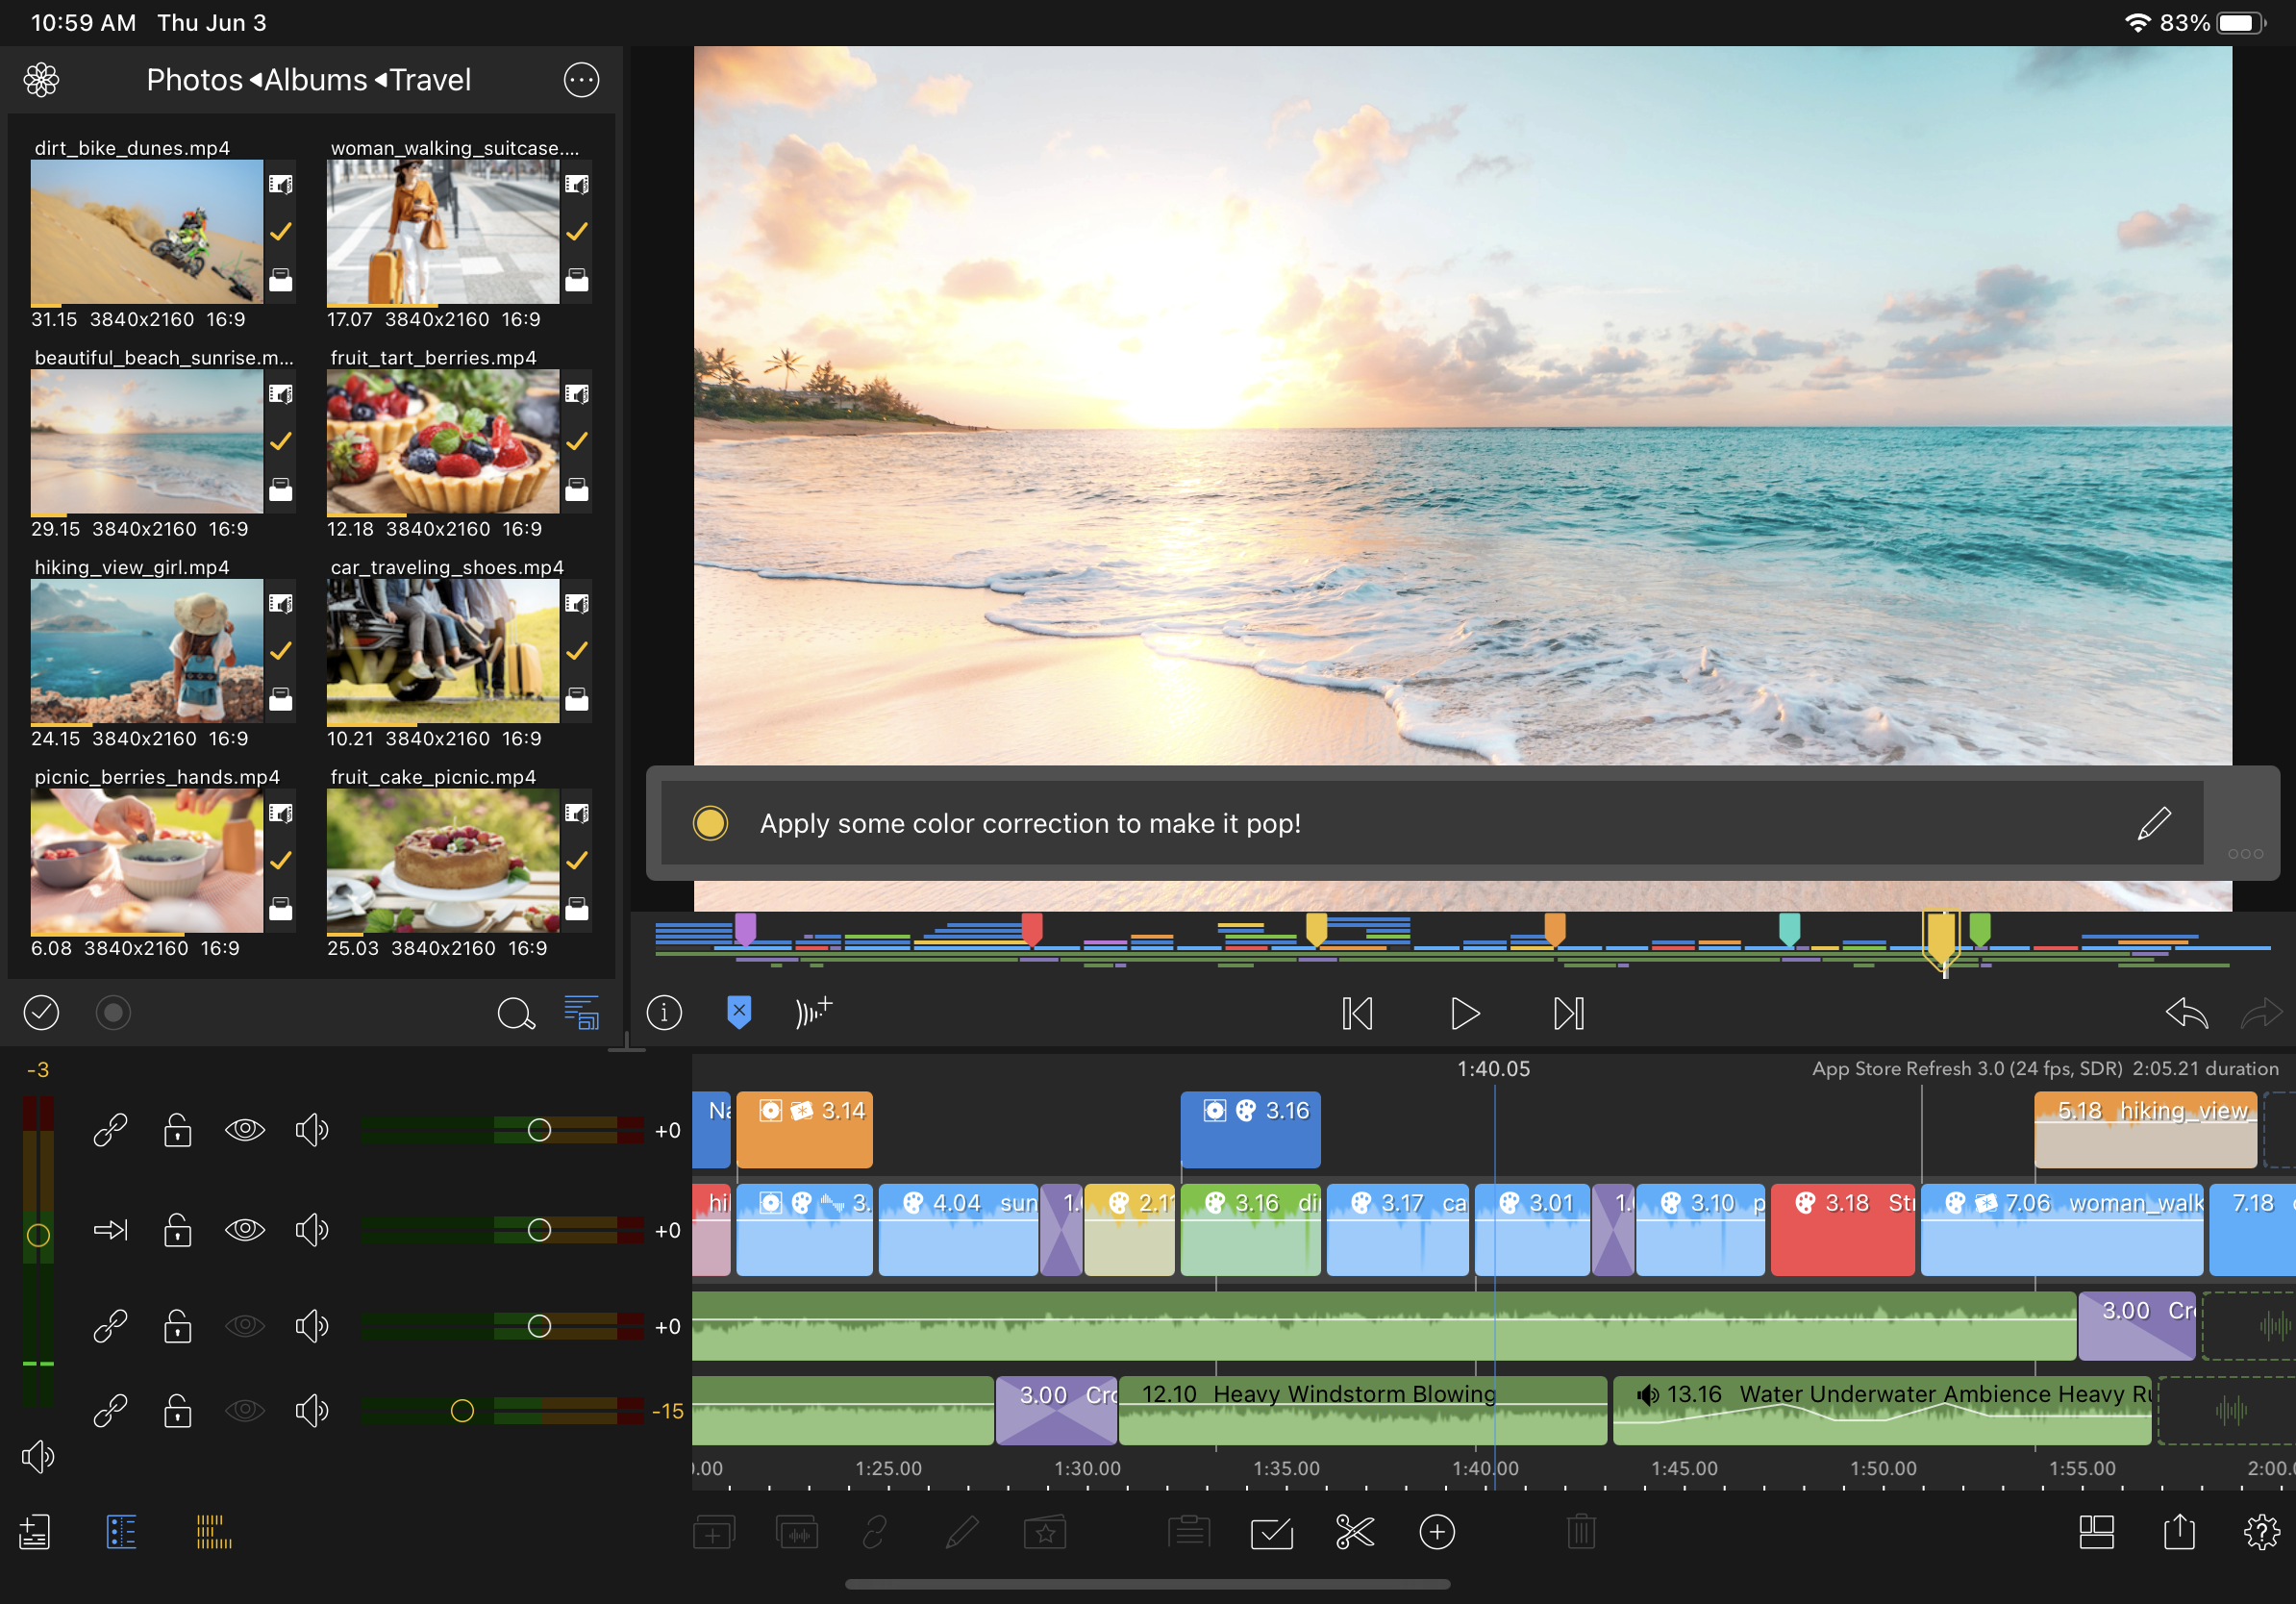
We’ve up-optioned the Send-to-Timeline button at the bottom of the Preview window. A long press on this button now gives you three different options for how you drop a clip onto your Timeline. Insert to Main adds a clip and pushes other clips to the right. Overwrite to Main simply overwrites whatever the new clip is placed over. And the new option is Place to Secondary, which will place your clip on a track above whatever clips are on the Timeline. If you’re already using the maximum number of tracks at the Playhead location, the option won’t appear.
Start moving the clips around on the timeline and you might notice another improvement.
We’ve refreshed how the display looks when placing clips beside other clips on the Timeline. The guidelines are now thinner, with more refined coloring. We hope you agree this gives placing clips on the timeline a sleeker, cleaner aesthetic.
Another small change to clean things up happens when you take a clip into the Effects Editor. The clipboard button has moved from the bottom to the top to reduce clutter. But that’s not the only improvement you’ll notice when double tapping some media. Open up an audio clip to get a look at another refresh.
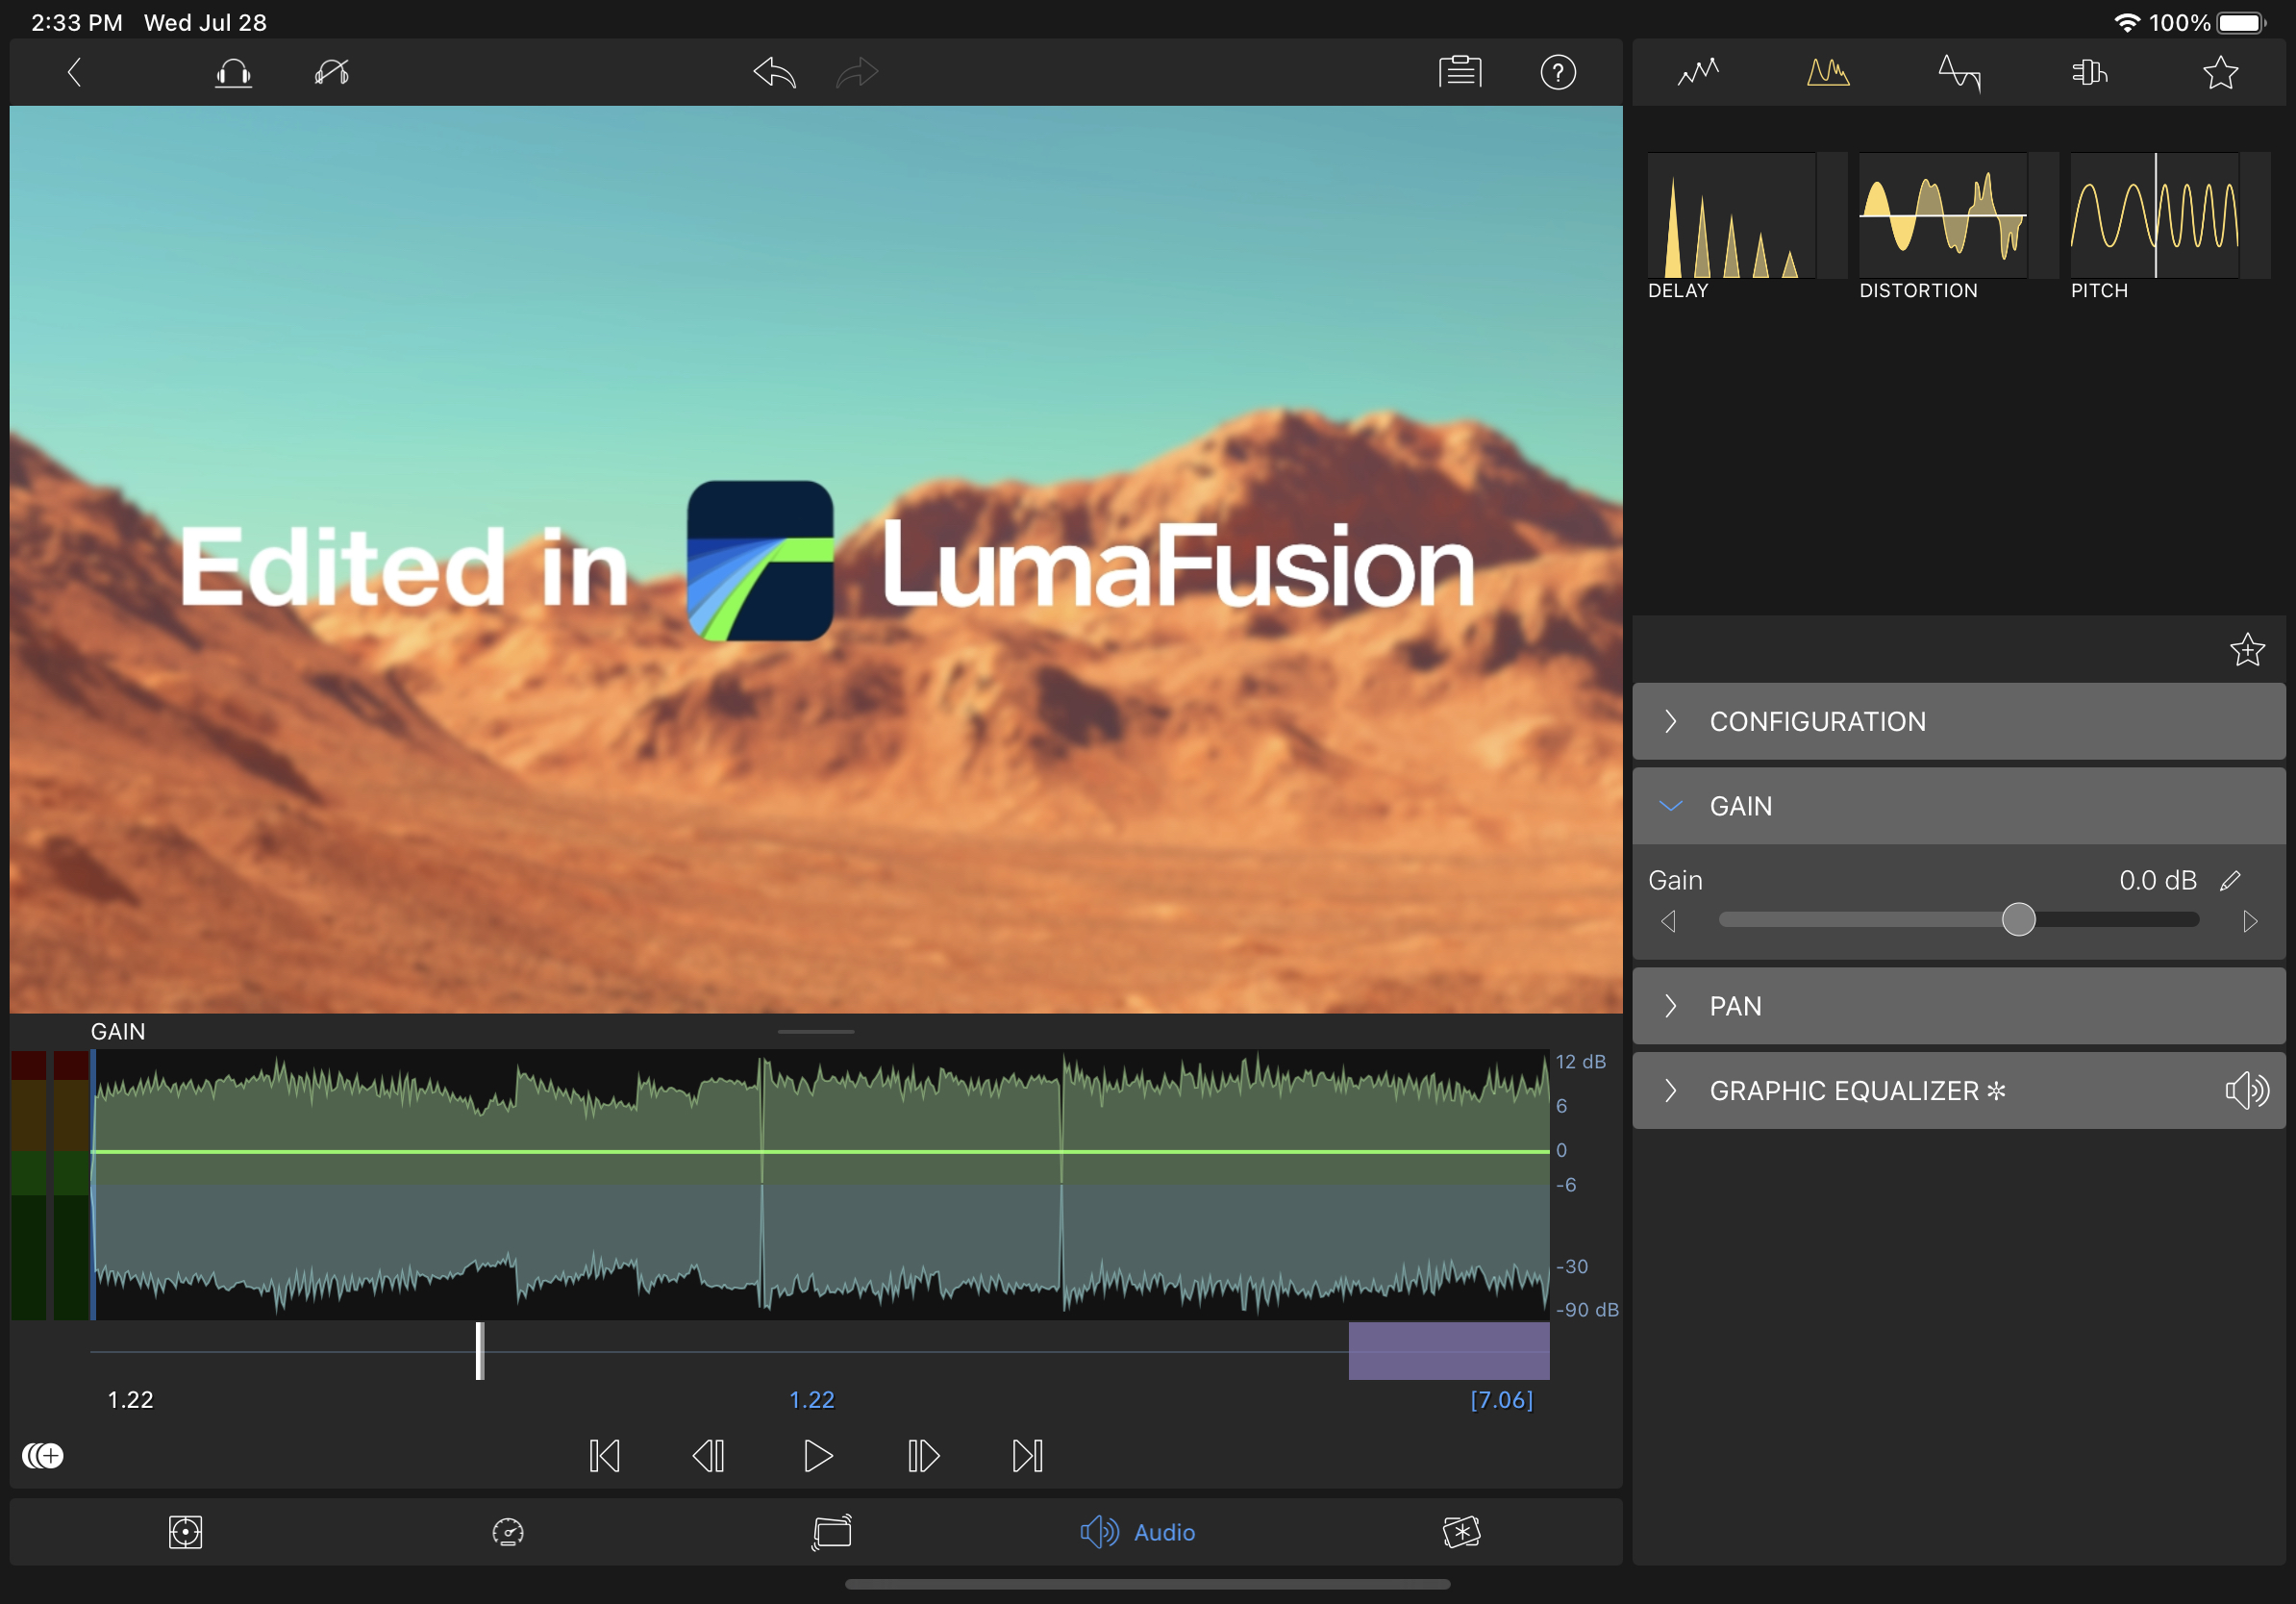
We’ve improved the audio interface in the Effects Panel. The waveforms are now easier to read and the Adjustable UI also works here. You can enlarge or shrink the waveform pane to make many tasks easier, such as applying a high or low pass and looking for sound pops.
Conclusion
We hope you enjoy LumaFusion 3.0 and get a chance to try out some, if not all, of the new features in your next project.
Ready to salvage some shaky video with the Lock & Load Stabilizer? Grab your device and adjust precise effects on your video with Numeric Inputs. While you’re at it, take full advantage of audio with the Graphic EQ and 3rd Party Audio Units, all while editing directly from an external drive. Don’t forget to customize the UI to your liking while exploring these new features.
LumaFusion 3.0 is packed with free features for editors and this update is only the starter course. We are hard at work on a number of new features to follow up after our 3.0 release. These include two new feature packs, bundling powerful, professional editing features and capabilities such as Multicam, Video Scopes, subtitle integration, proxy editing, speed ramping and more. The packs will be released as in-app purchases.
As always, if you experience any issues with the update or have a question, our support team is ready to help via support@luma-touch.com. You can also message us with suggestions on how to improve the LumaFusion and suggest future features.
Happy editing!